Replace El's Kitchen: International Comfort Food: quick
Showing posts with label quick. Show all posts

Tuesday, October 4, 2016

Cold Sesame Noodles

I love noodles!! It's a carb thing. I remember my first time having cold sesame noodles, I was taken aback. There was a large group of us and one of my friends was familiar with the restaurant so she ordered for all of us. I had no idea the dish ordered would be cold. Once I got over the shock, I realized I was in love. Not only is this dish tasty, it works particularly well when you need a quick meal (like a school lunch). The noodles only take 5 minutes to cook and it does not need to be re-heated. I actually always have a bag of flat buckwheat noodles laying around. It's perfect for that morning you decided to ignore the alarm and time got away from you.


But back to the noodles. I remember reading an article in the New York Eater about these noodles originating almost 40 years ago in New York at a restaurant called Hwa Yuan. The article stated that it was the favorite dish of all the stars. Well, we are all stars today. Hooray!!

Note: Adapted from the recipe in the New York Times. The recipe below suggests chinese sesame paste but I use tahini paste because that's what I have on hand in my house.

Cold Sesame Noodles
Makes 6 Servings

Ingredients:
1 pound Chinese buckwheat noodles (spaghetti noodles)
2  1/2 tablespoons sesame oil
3 1/2 tablespoons soy sauce
2 tablespoons Chinese rice vinegar
2 tablespoons Chinese sesame paste (or tahini paste)
1 tablespoon smooth peanut butter
1 tablespoon sugar
1 tablespoon grated ginger
2 teaspoons minced garlic
2 teaspoons chili -garlic paste - optional

Garnish: Carrots, cucumbers or radishes cut into match sticks
sesame seeds
finely chopped green onion

Note: 2 packets of soy sauce equals a little more than 1 tablespoon. Yeah, I've done it. So what.

Directions: 

Bring a large pot of water to a boil. Add noodles and allow noodles to cook about 5 minutes or until tender.

Drain pot and rinse noodles with cold water.


Sprinkle noodles with 1/2 tablespoon of sesame oil. Place noodles in the fridge.

In a bowl whisk together sesame oil, soy sauce, rice vinegar, sesame paste, sugar, ginger, garlic and chili -garlic paste (if using)

Pour sauce over noodles and toss.

Add garnishes.

This is really a versatile dish that can become a full meal if you add a protein like tofu or chicken.


So, how will you eat your sesame noodles?


Tuesday, September 13, 2016

Thai Basil and Beef Stir Fry

Ever have an idea that grows into a huge project? Our garden started as just a little box of herbs on our balcony. Eventually, it grew into the staple of our summer times dishes. This year we've had to be especially diligent about picking basil and mint from our garden. The basil in particular has a mind of its own and has spread to other plants. So, we're also trying to find different recipes we can use it in. This week we had a stroke of luck and we received some free steaks. Woo hoo!! I love free. Of course, that cemented what I would make. Thai Basil and Beef Stir Fry.  I had a little dried Thai Basil left over from another dish I had made, so I mixed it with fresh basil from the garden.


I love Thai food and this dish, has all my favorite elements, layers of flavor, a bit of spice, tasty vegetables and it can be served with rice. It's filling and warming. And not just because of the heat from the Thai chili peppers. I'm pretty conservative with the amount of pepper I add but if you like spice add another chili pepper and make sure to add the seeds.

Now that I think of it, this is actually a great dish for several other reasons. It utilizes the excess basil in the garden, it includes vegetables but more importantly, it's quick and easy. It only takes about 20 minutes to make. That's so important on a week night. Of course, some of these items you may not have in your cabinet if you don't make Asian inspired dishes. But if you know you want to make several different Asian dishes it will be important to keep items like soy sauce, fish sauce and ginger on hand. I keep those items stocked in my pantry to add variety to our lunches and dinners. Having those things on hand makes life easier. In the end, you can't hate great food, done fast. Now that's comforting on so many levels.


Thai Basil Beef Stir Fry
Makes 6 servings

Ingredients
1 pound of beef
2 teaspoons of cornstarch
2 tablespoon sesame oil
1 teaspoon oyster sauce
1/2 tablespoon of fish sauce
2 red bell peppers sliced
1 onion thinly sliced
1 can of baby corn
2 carrots sliced
4 ounces of mushrooms sliced
4 cloves of garlic (chopped)
2 teaspoons fresh ginger grated
1/4 teaspoon sugar
1/3 cup of soy sauce (Low sodium)
1 hot red pepper/ thai chili pepper (chopped)
1 cup of fresh/dried thai basil (Italian basil will do though the flavor will be slightly different)
1 cup of chopped thai basil
1/4 teaspoon salt
1/4 teaspoon ginger powder
1/4 teaspoon garlic powder
Juice of 1 lime

Directions:
Whisk together fish sauce, oyster sauce, soy sauce, sugar and ginger.

Slice beef thinly (against the grain-look for lines) then sprinkle with ginger powder, garlic powder and salt.

Mix beef with 1 teaspoon of sesame oil and cornstarch.

Heat wok or large pan over high heat and add 1 tablespoon of oil.

Place beef in pan and cook until browned. About 2 minutes per side.

Remove beef from pan and set aside.

Add the rest of the oil and chopped garlic and Thai chili pepper to wok/pan. Cook for 30 seconds

Next add onions and red peppers to pan. Cook until onions caramelize.

Next add stir fry vegetables and allow to cook for an additional 5 to 8 minutes.


Toss beef back in with soy sauce mixture and dried basil (if you are using dried basil)
and stir into vegetables.

Add fresh basil and stir.
Serve over rice with a spirts of lime and enjoy.


Tuesday, September 6, 2016

Fried Tofu with Ginger-Sesame Sauce

September is back to school time and many of us hope to send happy little faces to school to become better versions of themselves. So, we try to send them to school with everything they need and a little piece of home. Something that makes them smile when they open their backpack or lunchbag. But how do you fit that type of comfort in such a small bag with all of the restrictions the school has. The no gluten, no nut etc etc has been the bane of my school lunch existence. What to do? What to do?


Of course, in our house we don't change what we eat because you're a mini me, so this is another  obstacle with school lunch. But this fried tofu lunch doubles just fine for an adult and a child. The original recipe comes from Food and Wine magazine and has a bit more spice. I had to cut down on the red pepper flakes in the ginger-sesame sauce for my little but that spice can be added back in later. This sauce is actually so good, I think about pouring it over other proteins. Like maybe fried chicken wings?? I might have to give the Korean fried chicken place a run for its money. Of course, you should enjoy the sauce whatever way you choose.


Fried Tofu with Ginger-Sesame Sauce
Makes 4 servings

Ingredients:
Ginger-Sesame Sauce
1/2 sesame oil
2 teaspoons grated ginger
2 cloves grated garlic
1 scallion
1 1/2 tablespoon Soy Sauce
1 tablespoon water
1/4 teaspoon crushed red pepper flakes

Fried Tofu
14 ounces firm tofu
2 tablespoons of vegetable oil

Directions:

Slice tofu into 8 thin slabs. Allow tofu to dry on a paper towel.

Lightly sprinkle tofu with salt and press out excess moisture.

While tofu is drying out, in a small bowl whisk together sesame oil, ginger, garlic, soy sauce, water and red pepper flakes.


Set ginger sesame mixture aside.

In a large skillet heat 1 tablespoon of oil (tofu should be added to an already hot pan).

Cook the tofu in two batches using 1 tablespoon of oil for each batch.


Add tofu slabs and cook over medium heat. Cook for approximately 3 to 5


minutes on each side or until tofu is lightly browned on each side.

Spoon ginger-sesame sauce over fried tofu and sprinkle scallions over.

Serve over rice or steamed vegetables.

When packing this as a lunch, I put the sauce in a separate container to be poured over the tofu and vegetables later.


Quick, easy and versatile. If you do not like tofu, you can swap it out for any other protein and it will work.


Monday, July 18, 2016

Salmon Cakes

From Japan to England there are many countries that have a version of a fish cake.  Bengali fishcakes are made with white fish and chilies.  In South America, potatoes are added. This simple more American version of a fish cake is a crowd pleaser and along the lines of something you'd see in the south. These salmon cakes are a personal favorite as far a comfort dishes go. But I'd be willing to bet that any version of this dish from any country would suit me just fine.


What warms my heart when it comes to this dish? Maybe it's the memories of salmon cakes and grits from my childhood or traipsing through the Inner Harbor of Maryland with friends making a good time of eating every fish cake we could find. Maybe that's why this is a favorite summer dish to me. Summer was when we  had the opportunity to travel and just enjoy life. What ever it may be, I always try to have some canned salmon on hand to make these delicious fish cakes. Forget all that extra breading, we want to taste the salmon.  And if made correctly there is a bit of a crisp outside that will stand up to whatever you throw at it. It's your choice how and when to serve it. Whether it's at breakfast with grits, like down South, or on a nice buttery toasted bun it's the perfect satisfying summer dish. Filling and tasty without being too heavy.

Salmon Cakes
8 patties

Ingredients

1 can of pink salmon
1 large egg (beaten)
1/4 cup of minced onion
1/4 cup of chopped green pepper
1/2 cup of bread crumbs
1/2 teaspoon of flour
2 teaspoons of parsley
4 tablespoons of vegetable oil

Tools: Cast iron pan (frying or saute pan) spatula

Directions:

Go through canned salmon and remove bones.

In a mixing bowl combine salmon, onion, green pepper, bread crumbs, flour and parsley.

Once thoroughly combined, mix in egg and a pinch of salt and black pepper.

Mold salmon mixture into patties.

Heat vegetable oil in pan on medium high heat.

Once oil is hot, add salmon patties (do not crowd the pan).

Once bottom begins to brown (approximately 4 to 5 minutes) flip salmon cakes.

Cook an additional 4 to 6 minutes until golden brown.

Serve as you like.


Monday, January 25, 2016

Ratatouille

Anyone else on the "New Year" workout kick? Most of my friends are in the gym but they were there  before the New Year. I'm the only one leading the charge in the opposite direction of healthy. I don't know how my husband deals with me. He great at getting his workouts in and eating healthy, then he comes home to brownies and cake. Despite my need to go against the grain, many of our meals have been protein not carb heavy these days. So much, I really needed something a less heavy. Dare I say it, healthier.


Of course, the recent snow storm hit us pretty hard so on this cold wintery weekend, I knew I couldn't  just make a "healthy" salad. We would all need something that warmed our bones. Especially, after being out in the snow all morning. Luckily our t.v. stays on the Disney channels and what movie commercial just happened to pop up on the screen, Ratatouille.

I know, I know, I am grown. But I love that movie and so does mini me. It's the movie that gave me the inspiration for what to do with all of the eggplant, tomatoes and peppers that grew in my yard one year. Initially, I was at a loss. I made baba-ganoush, sautéed eggplant and made eggplant lasagna (where I replaced the noodles for eggplant), I can't remember what other recipes I tried but the one that stuck was the ratatouille.

Many people have different ways of making the dish. Some add squash. Others mushrooms. In the end, I just used what was in the fridge. Some people dice all the vegetables. In the movie, I love how everything is sliced into perfect round circles. Unfortunately, I didn't have time for that though I would have loved to break out my mandolin. I needed it done quick, fast and in a hurry. No one wants to wait for food after being outside in the cold. Dicing the vegetables up and using  canned tomatoes cuts the cook time down to 30 minutes max. I served this over some quinoa because it's important to have protein after putting in hard work in the snow. Not to mention the Vitamin C in tomatoes can help increase the body's ability to absorb iron.

Ratatouille

Makes 6 servings

Ingredients 
1 large eggplant diced
2 bell peppers diced (yellow & green)
1 zucchini diced
1 15 ounce can of diced tomatoes
2 cloves of minced garlic
1/2 large onion diced
1/2  teaspoon of thyme
1 tablespoon of oregano
1 tablespoon of parsley
1/4 cup of olive oil, more may be needed
1 bay leaf
Salt and black pepper

Tools: Large sauté pan or dutch oven


Directions:
Place dutch oven over medium high heat and add half the olive oil.

Once pan is hot add diced onions and cook 5 to 7 minutes until they begin to caramelize.

Add eggplant and thyme sprinkle with salt and pepper.

Stir and cook eggplant for approximately 5 minutes.


Remove eggplant and onions from pan and set aside.

Add more olive oil to the pan then add zucchini and peppers.

Cook for 5 minutes making sure to turn zucchini occasionally. Sprinkle with salt and pepper.

Return eggplant, thyme and onion to the pot along with garlic, tomatoes and herbs (including bay leaf).

Salt and pepper to taste.

Cover land and cook for an additional 10 to 15 minutes stirring occasionally.


There you go a quick, easy, healthy dish that warms you up on a cold day. Add a nice French baguette, some butter and you are set.

Monday, November 23, 2015

Sweet Potato Pancakes

So I've been mulling over this idea of Thanksgiving Brunch ever since we had brunch at my friends house the other weekend. The holidays can be a stressful time especially when there's the expectation to see everyone the same day. I remember when my husband and I were back and forth on the highway from the afternoon until midnight trying to see all of our family during the holidays.

Though that's not an issue anymore, it's one many of our friends still struggle with. The holiday shuffle can make you dislike the holidays altogether. So I was thinking maybe there should be a new tradition. Thanksgiving Brunch!! To be had the day of or the day after Thanksgiving (if you can convince one family). Or maybe have brunch for Friendsgiving.


A spin on all Thanksgiving favorites for brunch. Last week's spinach salad can be remixed into a great brunch salad. Just add Turkey. This dish will add the sweet to brunch. I was going for a sweet potato pie feeling. So, let's make some sweet potato pancakes.


Sweet Potato Pancakes
Makes 14 pancakes

Ingredients:

1 1/4 cups of sweet potatoes (3 baked sweet potatoes)
1 1/2 cups of milk
1 1/2 cups of flour
2 eggs beaten
3 1/2 teaspoons baking powder
1 teaspoon pumpkin pie spice
1/4 melted butter
1 teaspoon salt
1 tablespoon brown sugar

Tools: blender, thin spatula, griddle and whisk.

Note: Feel free to switch of the sweet potatoes for pumpkin if that's what you prefer.


Directions:

Mix all of the dry ingredients.

Mix the sweet potatoes, milk and vanilla.

Place wet ingredients in blender to make the mixture smooth.

Add eggs to wet ingredients.

Add dry ingredients to wet ingredients a cup at at time.

Mix thoroughly.

Allow mixture to sit for 15 to 20 minutes.

Place the griddle over medium heat.

Pour about 1/4 cup of batter onto the griddle.


Cook until you see little bubbles and the pancakes begin to firm enough to flip. This should take about 3 minutes.

Flip pancakes and allow to cook for another 2 to 3 minutes.

Transfer pancakes to a plate or platter and cover with foil to keep warm.


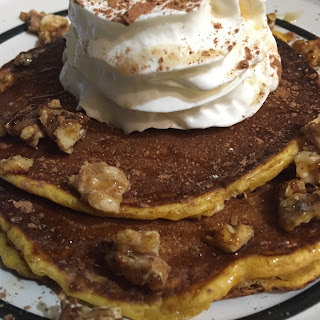
These pancakes were drizzled with a little maple syrup and topped with candied walnuts, whipped cream and cocoa powder. Delicious. I love the smooth consistency of the pancake.

Brunch anyone?


Monday, November 16, 2015

Spinach Salad for Brunch

So this weekend was super busy. So busy I did not have time to plan dishes specifically for the blog. Much of my focus was on trying to figure out an AIP Paleo dish to bring to my friend's house for brunch. I always try to adhere to my friends dietary restrictions. It's so important to make everyone feel included. But there was a hiccup. I found a recipe for a wannabe banana crepe filled with strawberries and coconut. I knew it would be a hit. But I didn't have ripe enough bananas so I had to figure something else out. Then it came to me...salad. It's versatile enough that I could figure out how to get everyone's favorite brunch foods into this one dish.


As we were sitting down to brunch with my girlfriend and her family I realized my friends think I create lavish and indulgent dishes all the time. She told me they thought breakfast on the weekend was like brunch at the Waldorf (I'm exaggerating a bit but you get it). So I was happy that she was thoroughly impressed with the salad I brought. Don't get me wrong... I know there is a bit of an expectation when I show up. I did it to myself. But in the end, I would absolutely hate to disappoint my friends.

 But it was wonderful to know that my friends love me so much they are even happy when I bring a salad. Who knew?

This salad is wonderful because you can make it whatever way you would like. Have it with spinach, bacon, apples and walnuts. OR with eggs and avocado. In the end, everyone was happy and that's what matters.

Spinach  Salad
 Makes 6 servings

Ingredients
6 oz bag of spinach
6 slices of bacon
6 boiled eggs
4 oz of grape tomatoes
1/4 cup of walnuts
2 green apples
1 peeled orange (seeds removed)
1 hass avocado
Creamy balsamic dressing

Directions:
Place 6 slices of bacon on a baking sheet.

Set oven to 425 degrees and bake bacon for 17 minutes.

Place 6 eggs in a pot of water and allow to boil for 12 minutes.

While bacon and eggs are cooking, chop walnuts. Then dice avocado and apples.

Once bacon is cooked place on and paper towel and dab with another paper towel to remove grease.

Chop bacon.

Allow eggs to cool (rise with cool water) then begin to remove eggs.

Once shells are removed slice the eggs in half.

In a salad bowl, place spinach and bacon and toss gently with a little balsamic dressing.


This is a great brunch salad and everyone gets to make it the way they like it. The children had a sweet version with fruit and the adults had a savory version with avocado and tomatoes. I squeezed a bit of juice from the orange on the kids salad. Yum...

Thursday, November 12, 2015

Crab Cakes

Sometimes it's hard to try to find a balance during the holiday season. I find that many of my friends are buckling down with the finances during this time of year. Whether they are saving to buy holiday presents or beginning to plan for their vacation people are thinking a little more strategically. Of course, being more fiscally conservative is a good thing.


We follow the same pattern in my home but the one area where we seem to go crazy is with food. Yeah, but you would not have guessed that. Many years ago we realized we went a little food crazy during the holidays. Since then we've put or planned a little extra on the side so we could enjoy whatever food we wanted during the holiday season. I know saving for food but sometimes you've got to pay for a good piece of beef.

One thing I try to do is clean out the fridge. I don't mean throwing food in the garbage I hate waste. It's actually why we started composting. I clean out the fridge by cooking the food that has ended up in the back of the freezer. The extra bits of stock, beef etc that sit in the back of the fridge. It also helps to make room in the fridge for the Thanksgiving ham or turkey. Lucky for me there was a bit of crab in the back of the fridge. Hello...


Crab Cakes
Makes 4 servings

Ingredients
8 oz of crab meat, drained
1/2 cup of bread crumbs
1 egg, lightly beaten
1 tablespoon of  butter
1 teaspoon of parsley
1 teaspoon oregano
1 teaspoon mayo
1 teaspoon of Worcestershire sauce
1/4 teaspoon ground mustard
1/8 teaspoon of salt
1/8 teaspoon of pepper
1/8 teaspoon of old bay
1 lemon cut into wedges


Directions:

Preheat oven to 350 degrees.

Melt butter and set aside to cool.

In a bowl combine crabmeat and all ingredients. Mix well.

Use mixture to make 4 patties.


Place patties in the fridge for at least 30 minutes. (Mine ended up in the fridge for an hour.)

Grease a baking sheet and bake crab cakes for 25 minutes.


Turn crab cakes after 12 minutes. Crab cakes should be lightly browned.

Serve these on hamburgers buns with tartar sauce and a squeeze of lemon.
Add some french fries. Yum!!


Tuesday, September 8, 2015

Corn Chowder

I thought about writing the intro to this like a rap song. It's an ode to another time in my life ... college. I've had many conversations with my friends about how we miss Maine. So when I saw Rachel Ray making Fish and Corn Chowder the way people in New England make it, it made me reminisce. There are some dish that are just made better in New England. I found that out when I tried to order a lobster roll and was fed a cold lobster sandwich with mayo.


When I decided to try this recipe I knew I had to enlist the help of a very truthful friend. There are a couple of friends I know I can ask when I'm trying recipes out and I was lucky enough to have my girlfriend come over and be a guinea pig. But I had to make some adjustments. She doesn't eat pork and seafood is a no, no too. But I really wanted to make this dish. I had been craving a new England dish since we cancelled our trip to Maine.

Luckily, I figured it out. No epi-pens needed. Whew. Though I may try this dish again, with pork bacon and crab. I will continue to add additional potatoes and corn starch (or maybe flour) because I like my chowder thick.

But back to my initial thought... I have to go with it. For my friends that do not eat pork
"This goes out to you. This goes out you. This goes out to you, and you and you..."

Corn Chowder
Makes 6 servings

Ingredients
1 tablespoon of olive oil
2 ribs of chopped celery
1 heaping tablespoon of minced garlic
1 diced onion
2 bay leaves
2 tablespoons of thyme
1 teaspoon of paprika
4 slices of turkey bacon
4 ears of corn (kernels removed)
4 red potatoes diced
1 cup of heavy cream
1 cup of almond milk
2 cups of chicken stock
1 tablespoon cornstarch
Salt and ground black pepper

green onions - optional
sriracha - if you like spice it's really good -optional
chicken or Crab -optional

*Note: You can eat this dish by itself or add crab or chicken. It is also ok to use seafood stock instead of chicken stock. It's your preference.


Directions:

Pour a tablespoon of olive oil into a large pot over medium heat. Allow the pot to get hot then add bacon. Allow the bacon to brown and crisp.

Once the bacon is crispy, add celery, onions, garlic, bay leaves and thyme. Once onions and garlic begin to brown use a paddle or spoon to scrape the bottom of the pot.

Add the corn, potatoes and paprika to the pot and cover. Allow everything to cook for 5 minutes.

Then add chicken stock to the pot and allow to simmer for 10 minutes.

In a separate pan on medium low heat, allow butter to melt and add heavy cream.

Then add cornstarch and whisk together until mixture is thoroughly combined. For even thicker chowder add flour. Add mixture to corn and potatoes, then add almond milk.

Allow chowder to simmer on medium low heat for another 10 minutes.

Salt and pepper to taste. The amount of salt you add greatly depends on how salty your bacon is.

Hope you enjoy it as much as we did.


Monday, August 31, 2015

Indulgent Brownies

These brownies are ridiculous. One of my students made a version of this for me in cooking class. I was pregnant at the time and it seemed as if it was her mission to see how much she could feed me. It was sweet, my students wanted to take care of me. So these brownies have a special place in my heart. It's always nice when someone does something just because they think it might make you happy.


The original recipe is just a mixture of cookies and brownies. Since I tend to overdue it, I'm going to add an additional level by adding chocolate chips to the batter which is also made out of chocolate chips. I typically add walnuts to my brownies but I knew I would be giving these away and I was worried about nut allergies. I'm a big fan of using what is already in the house so this recipe is right up my alley. I'm not sure how it happened but there seems to be an over abundance of chocolate and chocolate chips in the house.

Indulgent Brownies

Makes 9 Brownies

Ingredients

12 cup of sugar
2 tablespoon of butter
2 tablespoon of milk
12 cups of semisweet chocolate chips
2 eggs (room temperature)
1tsp of vanilla extract
 23 cups of all purpose flour
1tsp of baking soda
12 tsp of salt
12 chocolate chip cookies
1cup of chocolate chips

Directions

Preheat oven to 350 degrees. Grease an 8 x8 inch square pan.

On low heat in a medium saucepan combine sugar, butter and milk until boiling.

Remove mixture from heat and add chocolate chips until melted and smooth.
Let the mixture cool.

While chocolate is cooling, combine flour, baking soda and salt in a separate bowl.

Add eggs and vanilla to chocolate mixture. Then add flour mixture.

Chop the chocolate chip cookies into small chunks. Place the chopped cookies on the bottom of the greased pan.

Sprinkle chocolate chips into brownie mixture and pour over cookies. Spread mixture evenly in the pan.

Bake for 25 to 30 minutes. Remove pan and let cool for an additional 20 minutes.


Cut into squares  or rectangles and enjoy.


Thursday, August 13, 2015

Spicy Shrimp and Cheesy Grits

Needed a little reminder of my vacation with the ladies this week. A couple of months ago the girls and I headed down to New Orleans for some good food and music. And that was just what New Orleans delivered. I couldn't have asked for better food or a better time. It was just what I needed. No matter where we were, whether in a restaurant or a friend's home, everything was delicious. So with the hectic weeks we've had and no sign of a break in sight, I'm missing New Orleans. Just a little.


So you know what I decided to do? I set out to create a little New Orleans comfort. I needed something quick and easy. The last couple of days have been a whirlwind and I just did't have time for anything too involved. What cooks up quick? Shrimp. Shrimp and grits it is. A spicy shrimp and grits would do just fine. I couldn't spice the shrimp too much (mini me wouldn't be able to eat it) so I left a lot of the heat off initially and added it to my plate later.

Spicy Shrimp and Cheesy Grits

Ingredients

Spicy Shrimp
1 pound of shrimp (peeled & deveined shrimp)
4 slices of bacon
1/2 tsp of garlic powder
1/2 tsp of salt
1/4 tsp pepper
1/2 tsp cayenne pepper
1 tsp cumin
pinch of red pepper flakes
green onions for garnish

Cheesy Grits
1 cup of quick grits
4 cups of water
2 tbsp of butter
1/2 tsp kosher salt
4 oz of extra sharp Vermont white cheddar cheese
4 oz of sharp cheddar cheese


Directions

Over medium heat bring 4 cups of water and salt to a boil.

Once boiling stir in the grits. After about 10 minutes you will notice the grits thicken.

Add butter to the grits and stir. Turn the heat to low and stir every 4 to 5 minutes.

While the grits are cooking shred the cheese and fry the bacon on medium low heat until crispy.

Yes, I'm cooking bacon on the stove. But only so I can sauté the shrimp in bacon grease. It's good to reuse... it's environmentally friendly! And delicious!

After 20 minutes add shredded cheddar cheese to the grits a handful at a time. Stir, stir, stir.


I know the package stated these were quick grits but we're cooking it for at least 30 minutes.


Mix the garlic, salt, pepper, cayenne and cumin in a bowl or a plastic bag. Add shrimp and coat with the mixture.

Using the pan with the bacon grease, sauté the shrimp over medium heat. Sauté for 2 minutes on each side or until shrimp are pink. Depending on the size of your shrimp it may only take 3 minutes for the shrimp to cook.

Now for the pièce de résistance ... you get it... it's French... New Orleans... ha, ha, ha.
Make your plate. Cheesy grits on the bottom, then shrimp, crumble the bacon on top, sprinkle whatever else you want on top. More cheese...yes please. Green onions. I'll take those too.

*NOTE: More red pepper flakes, jalapeño peppers and/or cayenne pepper can be added to the shrimp once you've removed the shrimp for those with a less tolerable palate. In the end, I added more red pepper and pepper jack cheese to my grits. Yum!!

Friday, July 24, 2015

Grilled Cheese w/Bacon & Tomato

One go to meal for my mini me is grilled cheese. Just like his momma he loves cheese. There's something extremely satisfying about ooey gooey cheese and buttered bread. Of course, it's for the little one so I also try to make sure I've included healthy fruits and vegetables somewhere in his meals.

Adding tomatoes became the easy option since we have a little garden in the back of the house. I just walk outside and pluck it off the vine. Of course, if you've been reading the blog you've noticed that I have a new obsession with baking bacon. I might get passed it, but for now, I'm subscribing to the mantra "Everything is Better with Bacon."

Grilled Cheese with Bacon and Tomato

Ingredients:
4 Slices of Bread
4 Slices of Cheddar Cheese Slices
4 Slices of Tomato (sliced thin)
4 Slices of Bacon
Softened Butter

Directions:

Start by cooking your bacon. Since I bake my bacon and it takes about 17 minutes that allows the time needed for my butter to soften and for me to slice the tomato.

In a frying pan on medium heat, melt a little butter. Then spread a small amount of butter on the bread. Put the bread in the pan butter side down. After a minute or so the bread will begin to toast in the pan. Once it's browned flip it over. Now you're ready to start building your grilled cheese.

Add one slice of cheese to the bread then your sliced tomatoes.
Next add your bacon and another slice of cheese.
Then place your second slice of bread in the pan buttered side up.
Using a spatula flip the whole sandwich. Then with the spatula press down on the sandwich.
Cook for about 3 minutes. That should allow the bread to brown and the cheese to melt.

*Note: After talking to some of my friends I have some other options I'm going to try.
1. fried green tomatoes.
2. beef bacon...yum

Thursday, July 9, 2015

Bacon & Shrimp Fried Rice

One of my favorite comfort foods is shrimp fried rice. I don't know when it happened but It's been that way since I was a teenager. There was a great Chinese food restaurant about a block away and if I had a particularly bad day at school I would go and get a pint of pork fried rice or shrimp fried rice.

When I moved away from the city it got harder and harder to find a place that I really liked. And forget finding a place late at night. So I decided to make my own. After several failed attempts I came across a recipe that change everything for me. I felt like I had finally found the secret to getting the right flavor. Guess what it was...BACON. I know... how wonderful right. So now in the time it takes me to bake bacon, I can make delicious shrimp fried rice.

Warning... I use a wok to make fried rice but you could use a curved frying pan to get the same results.

Bacon and Shrimp Fried Rice

Ingredients
3 cups of cooked white or brown rice
2 eggs
4 slices of bacon
1/2 pound of shrimp peeled & deveined
1 cup of frozen vegetables unthawed (I like peas and carrots)
1/3 cup of fresh julienned green peppers
1/3 cup of fresh julienned yellow peppers
1/3 cup of sliced green onions
1/4 cup of bean sprouts
2tbsp of soy sauce
2tbsp of sesame oil
salt and pepper
powdered ginger
Chinese Five Spice


Directions
Place the bacon in a cold oven and let it heat up to 400 degrees. Allow the bacon to cook for approximately 17 minutes.

Place a little sesame oil (about 1/2 a tbsp) in the pan. Whisk the eggs together with a little salt and pepper and pour it into the pan. Allow it to cook like you are making an omelette. Once the egg is cooked remove it from the pan and cut it into thin slices.

Add 1 tbsp of sesame oil to the pan, then add your shrimp. Cook for about a minute then turn the shrimp and sprinkle with powdered ginger and Chinese Five Spice.
Then add your peppers, green onions, bean sprouts and unthawed vegetables. Let it cook for another 2 to 3 minutes. Toss everything together.

Add the rice and the rest of the sesame oil and soy sauce.
By this time your baked bacon should be done. Once it has cooled, cut it into thin slices and add it and your egg to the pan and toss everything together.

Monday, July 6, 2015

Herb Marinated Grilled Steak

After a long night of good fun and great friends, nothing is better than a great meal with the family. So I was excited when hubby was able to entice my mother and father to come over for Sunday dinner. Hubby is the grill master and despite an extended weekend he hadn't spent any time on the grill. In the summer, he typically lives on the grill. There is absolutely nothing he can't accomplish on that thing. Want it cooked low and slow? He can do it. Want it seared? You got it. Perfectly cooked fish? Yup, he can do that too. Outdoor cooking is not my domain, but what he cooks is so good it makes me reconsider.

So this Sunday we were graced with steak. We don't eat steak often, so when we do it's a real treat. Unfortunately, the last two times we were out and I ordered skirt steak I was disappointed. Well, disappointed no more...hubby to the rescue.

Herb Marinated Grilled Skirt

Ingredients

1/4 cup Parsley
1/4 cup Oregano
1/4 cup Bail
2 tsp Salt
2 tsp Pepper
5 cloves of Garlic
3 Onion slices
1/2 tsp of sugar
1/4 cup olive oil
1/2 tsp Worcestershire
3 lbs Skirt Steak

Directions
Combine herbs, garlic, onions, olive oil, sugar, Worcestershire, salt and pepper in a blender. Rub mix onto steak and let it marinate for at least an hour.

Place mesquite wood logs in the grill and set it on fire. Let the grill heat to 500 degrees. If you are applying the steak directly to the flame please make sure you turn it every 2 to 3 minutes. Direct heat will allow the steak to sear which will lock in all of the flavor and keep it moist.


Cook the steak on the grill for 10 minutes. 5 minutes if you prefer your steak rare.


Saturday, July 4, 2015

Fourth Filled Trifle


Part of what I love about the summer is the opportunity to spend time with family and friends. This  4th of July weekend my friend is having a huge BBQ. Typically her parties provide an opportunity for friends that have known each other for decades to spend some time together. She always has tons of food and it's always a great time. We all catch up and get to see each others children.  It really is a wonderful time. But with such a grand list of entrees, I wasn't sure exactly what I should bring. What do you bring the party that has everything? DESSERT...

Then the questions was, what to bring. I was lucky enough to have a friend make a wonderful strawberry filled suggestion. And I do think I will make that dessert but since it's the 4th of July, I'm going to go Red, White and Blue for dessert. I can't remember the first time I had trifle but I know I thought it was the best dessert ever. Quick and extremely satisfying. How could it not be? Pound cake, pudding, fruit and whipped cream...what more could you ask for?

This dessert idea came from a Taste of Home. I'm making some minor changes to utilize what I have in the house. I'm going to use strawberries instead of raspberries and vanilla pudding instead of lemon pudding. The pudding is more so a personal preference since that's how I originally had the dessert.

Strawberry & Blueberry Trifle

Ingredients
1 can of condensed milk
1 1/2 cups of 2 % milk
1/2 sour cream
2 packages instant vanilla pudding mix
2 cups of blueberries
2 cups of strawberries
1 package of pound cake
Sugar
lemon slice
whipped cream
sprig of mint


Directions
With a mixer, mix the condensed milk with 2% milk and pudding mix for about 2 minutes. Then fold in the sour cream.

Squeeze some fresh lemon in the strawberries and blueberries then toss with white sugar.

Cut the pound cake into cubes.

If want the free form trifle shown above use a greased spring form pan.
Otherwise you can use a trifle bowl or a tall clear bowl.

Add one layer of cubed pound cake.
Then a layer of blueberries.
Then add a layer of pudding mix and spread gently.
Add another layer of pound cake.
Then a layer of strawberries.
And another layer of pudding spreading gently.


Cover and refrigerate for 2 hours or overnight.

Before serving top with some whipped cream and a few extra strawberries and blueberries for garnish. I also like to add some fresh mint (I have tons in the garden).

My trifle is still in the fridge but below is a mini trifle I made.


Enjoy and have a  HAPPY FOURTH OF JULY!!