Replace El's Kitchen: International Comfort Food: Summer
Showing posts with label Summer. Show all posts

Tuesday, September 20, 2016

Corn and Poblano Empanada

September 15 is the beginning of Hispanic Heritage month. In celebration of hispanic heritage month I wanted to share some of my favorite dishes. The first is a corn and poblano pepper empanada. Typically I eat empandas filled with meat but while prepping for a dinner with some of my friends I realized I needed something without meat. Little did I know I, this carnivore would fall in love with a vegetarian empanada. The mixture of cream cheese, peppers, corn and potatoes creates the perfect gooey bite with a bite of crunch. It's extremely easy to make and requires very little cooking (especially if you use a frozen bag of corn). It's actually the prefect dish if you are in a rush  but want something filling and flavorful.


So congrats to those Latin American nations that gained independence throughout the month of September. It literally changed the course of the Americas. Of course, since I teach history, I think it's important to honor the contributions of all Americans. Of course, because of my upbringing I have an affinity for mi gente from this region. It's in their kitchens that I learned how to cook hispanic food from as young as 6 years old. My friends and their families welcomed me into their homes and their lives. Making a place for me in the kitchen and at the table allowing me to experience and enjoy hispanic food and culture years before I ever traveled anywhere. It is those bonds an ties that ignited my love of hispanic culture and cuisine. And to them I must say, thank you.

Corn & Poblano Empanada
Makes 12 Empanadas

Ingredients
1 tablespoon vegetable oil
2 poblano peppers (roasted and diced)
1 1/2 cups of corn
1/2 pound of petite potatoes (3) (diced)
1 green onion chopped
1/2 cup cilantro chopped
2 cloves garlic minced
2 ounces Mexican queso/Monterey jack cheese (shredded)
4 ounces cream cheese
1/4 teaspoon cumin
1/4 teaspoon salt
12 large empanada wrappers
1 egg, slightly beaten

Tools: baking sheet, spatula, parchment paper


Directions:

Preheat oven to 375 degrees Fahrenheit.

Roast poblano pepper over an open flame until slightly blistered. Once cooled dice.


Boil potatoes with sea salt over medium high heat for 20 minutes. Potatoes should be firm. Once cooled, dice.

Heat oil in a skillet over medium heat. Add diced garlic and stir until soft.

Add corn to garlic along with salt and cumin. Cook for 5 to 8 minutes. Corn should turn slightly brown. Remove corn and garlic from heat.

In a bowl, add cream cheese, monterey jack cheese, potatoes, poblano pepper, corn with garlic, green onion and cilantro. Season with salt and pepper.


Scoop two (2) spoonfuls of corn mixture into wrapper (use the back of the spoon to push mixture to the center.


Gently fold wrapper over lining the edges. Once edges a lined up gently press dough together with a fork.

Place parchment paper on baking sheet and spray with non-stick spray.

Gently brush empanadas with beaten egg.

Place baking sheet on the top shelf of the oven and bake until golden brown (about 20 minutes).


Note: This dish is great with some spice. When I'm not concerned with making it too spicy for my mini me I add some jalapeƱo peppers to the mix. I typically make a little spicy dipping sauce with garlic, hot peppers, onion and lime juice. Don't forget the salt and pepper.

How do you like your empanada? Mild or Spicy?


Tuesday, August 23, 2016

Chocolate Covered Apples

I needed something sweet this weekend but I thought the rain would keep us from my favorite place, the boardwalk. Of course, I didn't want the family to miss out on the experience. So I decided to create a little bit of the boardwalk at home. Let's be honest one of reasons for going to the boardwalk is the food. There are corn dogs and nachos and potato tornados. But  as I said I needed something sweet. And no wonder, a lot of the dishes I've made lately have been savory. So I figured the post this week should be some type of sweet street food. What to do, what to do? Candied apples also know as toffee apples. It's one of the first treats I wanted whenever I went to the boardwalk as a child. I remember the shop that sold it was all the way at the end of the boardwalk. I would run down that way tasting the salt in the air and craving the sweetness of a caramel or chocolate covered apple.


For most people in New Jersey and New York the summer ritual is to go to the shore/boardwalk. Whether it's Coney Island or Seaside, the end of summer hails as the last hurrah. The weather turned out better than expected, and we celebrated with a street food that's screams New Jersey. If no other dish does, this candy covered apple does since it originates with a candy maker from Newark, New Jersey. Of course, many other countries have a variation of this treat. From Australia to Brazil this sweet treat is the fav of carnivals and street celebrations. So, it's a great way to celebrate the end of summer. Enjoy

Chocolate Covered Apples

Makes 6 servings

Ingredients

6 Gala or Fuji apples
1 tablespoon of shortening
2 cups of semi sweet chocolate chips
6 popsicles sticks or lollipop sticks
4 ounces of almond slivers/ crushed oreos etc

Directions:

Twist of stems from the apples and push the lollipop/popsicle sticks down to the core.

Put apples in fridge while preparing the chocolate.

Slowly melt chocolate and shortening in a double boiler (glass bowl over pot of water) over hot water or microwave on high for 2 minutes. If microwaving stir halfway through.


Remove chocolate from heat and stir until completely melted and warm.

Dunk each apple into the chocolate. Let excess chocolate drip back into bowl.


Roll apples around in chocolate while turning it with the stick. Use a spoon if needed to cover the entire apple.

Roll apple in coating (of your choice). Make sure apple is covered completely.

Set on a cookie sheet lined with wax paper until chocolate has set.


Yippie... boardwalk food even though we are not at the boardwalk.

What would you cover your apples with?


Tuesday, August 9, 2016

Mexican Street Corn

After my last post several friends mentioned the street food they love. So, I think August is going to be street food month. And one item that's a summer favorite and a street food fav is corn. It's sweet and delicious. I came across Mexican street corn or elota one summer and haven't looked back.


Corn is the perfect street food because you can eat it with your hands. In Mexico it's skewered which keeps the cheese spread off your hands. The corn is slathered with a creamy, tangy spread that has a hint of heat. Initially, I wasn't sure I would like it. But that tangy spread coupled with the sweetness of the corn was absolutely perfect. Of course, I had to have another one to make sure I really liked it. I did. And the corn was the perfect compliment to a nice taco. In the end, it's a vegetable you won't have to force anyone to eat. Not even your kids.

Note: Sour cream and feta cheese were used because that's what I had in the house.

Mexican Street Corn
Makes 6 servings

Ingredients

6 husked ears of corn
1/4 cup mayo
1/4 cup Mexican creme or sour cream
1/2 cup cotija or feta cheese
2 medium cloves garlic mined
1/4 cup of cilantro
1/2 teaspoon chili powder
salt and pepper to season

Directions:
Place corn over medium high heat on a grill or grill pan (if using a pan add a little bit of cooking spray).

Cook for approximately 10 to 12 minutes turning occasionally allowing the kernels to char.

While corn is cooking mix mayo, sour cream, cheese, garlic cilantro and 1/4 teaspoon chili powder.

Add salt and pepper to taste.
(This is a thicker cheese mixture, for a thinner sauce combine ingredients in a blender for 10 to 20 seconds)

Use a spoon to coat the corn with the cheese mixture.

If you choose, add a little additional cheese and chili powder to finish.

And done!!

What's your favorite street food?


Monday, July 18, 2016

Salmon Cakes

From Japan to England there are many countries that have a version of a fish cake.  Bengali fishcakes are made with white fish and chilies.  In South America, potatoes are added. This simple more American version of a fish cake is a crowd pleaser and along the lines of something you'd see in the south. These salmon cakes are a personal favorite as far a comfort dishes go. But I'd be willing to bet that any version of this dish from any country would suit me just fine.


What warms my heart when it comes to this dish? Maybe it's the memories of salmon cakes and grits from my childhood or traipsing through the Inner Harbor of Maryland with friends making a good time of eating every fish cake we could find. Maybe that's why this is a favorite summer dish to me. Summer was when we  had the opportunity to travel and just enjoy life. What ever it may be, I always try to have some canned salmon on hand to make these delicious fish cakes. Forget all that extra breading, we want to taste the salmon.  And if made correctly there is a bit of a crisp outside that will stand up to whatever you throw at it. It's your choice how and when to serve it. Whether it's at breakfast with grits, like down South, or on a nice buttery toasted bun it's the perfect satisfying summer dish. Filling and tasty without being too heavy.

Salmon Cakes
8 patties

Ingredients

1 can of pink salmon
1 large egg (beaten)
1/4 cup of minced onion
1/4 cup of chopped green pepper
1/2 cup of bread crumbs
1/2 teaspoon of flour
2 teaspoons of parsley
4 tablespoons of vegetable oil

Tools: Cast iron pan (frying or saute pan) spatula

Directions:

Go through canned salmon and remove bones.

In a mixing bowl combine salmon, onion, green pepper, bread crumbs, flour and parsley.

Once thoroughly combined, mix in egg and a pinch of salt and black pepper.

Mold salmon mixture into patties.

Heat vegetable oil in pan on medium high heat.

Once oil is hot, add salmon patties (do not crowd the pan).

Once bottom begins to brown (approximately 4 to 5 minutes) flip salmon cakes.

Cook an additional 4 to 6 minutes until golden brown.

Serve as you like.


Monday, June 20, 2016

Lemon Palmiers

It's sumer and I've had my eye on a delicious pastry, a palmier. It's a French pastry that can be adopted to be either sweet or savory. It's not the typical sweet comfort I look for, but in the summer you don't always want something super sweet. It was probably best since I decided to make them with my little and he really doesn't need anything sweet ever (energy for days).


One of the best parts of making this dessert (besides eating it) is making it with someone. For this one, everyone was in the kitchen which made it hectic but lots of fun. Of course, that's what summer is like in my house. Lots of fun and silliness.  Giggles and snorts always bring a smile to my face. I guess the nickname of "French  Hearts" is also very fitting.

This dish is made super easy by using pre-made puff pastry. I also decided to breakout the ninja to create some lemon zest from the peel. When zesting, remember you only want the yellow part of the lemon. It's fine if you don't have a zester. You can use a peeler, grater or pairing knife to take the skin off.

Ingredients:

Puff Pastry
1 teaspoon lemon zest
1 teaspoon lemon juice
4 tablespoons sugar


Directions:

Preheat oven 375 degrees

Mix zest, lemon juice and 2 table spoons of sugar together.

Sprinkle a flat surface with 1 tablespoon of sugar.

Place defrosted puff pastry on a flat surface.

Roll pastry into a square on top of sugar.

Brush/ Sprinkle zest and sugar mixture on to puff pastry dough.

Gently roll the sides of the square pastry dough toward the middle.


Try to make sure the sides meet exactly in the middle.

Slice about 1/2 inch thick and place cut side up on the baking sheet (parchment paper).

Sprinkle with remain gin sugar.

Bake for 6 minutes. Palmiers should be caramelized and lightly browned. Turn and bake for another 5 to 6 minutes.

Transfer to a baking rack to cool.


Hope you have fun making this with your friends and family. I know I can't wait to make a raspberry version of this sweet treat.

Monday, May 30, 2016

Mama's Potato Salad

There are some holidays that come around and dishes accompany such events. Sometimes it just doesn't seem like it's the holidays with it. Potato salad is one of those dishes that remind me of summer. Memorial Day was created to honor  the men and women who died serving in the U.S. military, for many Americans the holiday kicks off summer. So it's time to make some potato salad.


I've tried and tried and tried to make potato salad but it's never like my momma's. I know what goes in it. I've watched her make it thousands of times but I have never been able to replicate it... until now. Mom sat at the table with me and walked me through it. Come join us.


Mama's Potato Salad

Makes  8 servings

2 1/2 pounds of potatoes (peeled & cut into quarters)
2 celery stalks (minced)
1/4 large yellow onion (minced)
1/4 cup red pepper (minced)
3 boiled eggs (chopped)
1 cup of mayo
1 teaspoon salt
1/2  teaspoon black pepper
1/2 teaspoon paprika
1/8 cup of sweet & tangy relish
1/8 spicy brown mustard
Green onion - garnish


Directions: 

Cover potatoes with salted water and bring to a boil over high heat.

Boil potatoes for 12 to 18 minutes or until tender
(cooking times varies based on the size of your quartered potato).

Once finished, drain water and place potatoes in fridge to cool.

Boil eggs in water for 12 minutes.

Remove eggs and place in fridge to cool.

Combine mayo, salt, black pepper, paprika, relish and spicy brown mustard in a large bowl.


Combine potatoes, red pepper, celery, eggs and onion in a large bowl.

 Mix mayo mixture and potato mixture thoroughly but don't over mix.


Serve chilled and enjoy with your favorite main dish. If you're lucky, something off of the grill.


Monday, May 9, 2016

Mussels Fra Diavolo

I love Italian food. And I understand I'm impartial from I'm from the east coast but the east coast has some of the best Italian restaurants. One dish I've fallen in love with is seafood Fra Diavolo. Out with a girlfriend to catch up, she ordered it at one of those chain restaurants. To my surprise it was delicious. I was so happy she shared with me. I have a bad habit of not trying anything new because I hate paying for food I'm disappointed with. If I want average food I can fool around and mess it up in my own kitchen (of course that rarely happens). Who wants to pay for food they really don't like?

Of course, as with most dishes I did my research. I'm always interested in the origins of food and how it has evolved. To me food can truly be revolutionary. So, I was even more surprised when I found out that Fra Diavolo isn't an Italian dish at all.
Of course, when it comes to Fra Diavolo there is something warm and soothing about a nice, tongue tingling tomato broth. It's easy to fall in love with this dish. Just as wonderful as the taste is the ease to make it. It can be finished before that frozen garlic bread you put in the oven. Of course, it's another one of those dishes that's disguised as one thing but really it another. Though Fra Diavolo is served in many Italian restaurants it is and American dish. Which I guess is perfect. It's a chameleon. Swap out the mussels for shrimp. Or have it the traditional way with lobster. In the spring on a rainy day or in the winter to warm your bones. Any way you decided this New York dish is delicious and easy to make.

Mussels Fra Diavolo

Makes 8 servings

Ingredients

2 pounds of mussels
1 tablespoons of olive oil
2 tablespoons of fresh parsley (chopped)
4 cloves of garlic ( minced)
1/2 cup of dry white wine
1/2 cup of seafood or vegetable broth
1/4 teaspoon of oregano
1/4 teaspoon of dried chili peppers
2 cups of diced tomatoes
1 medium onion (chopped)
1/2 teaspoon kosher salt
1/2 teaspoon of pepper
1 bay leaf

* Note: Buy your seafood as fresh as possible. If you like spice add more chili peppers/red pepper flakes.

Directions:
If not cooking mussels right away keep refrigerated. In a breathable bag (do not tie the plastic bag).

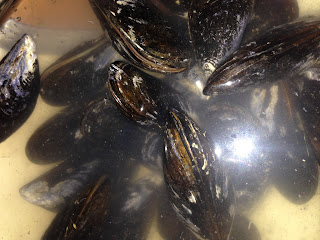
Remove mussels that are open and do not close when tapped on the counter. Soak mussels in cool water for 20 minutes. This should help to remove sand and dirt.

\
To clean mussels, scrub shell with a soft brush and remove beards (use knife to grasp beard and pull toward the hinge).

In a large pot /dutch oven heat olive oil over medium heat.

Add onion then garlic. Cook stirring occasionally until onion turn translucent.

Stir in 1 tablespoon parsley, oregano, thyme, and red pepper flakes.

Add seafood broth and white wine. Gently scrap the pot and stir the contents.

Add diced tomato and bay leaf. Stir.

Reduce heat and simmer for 25 minutes.

Add mussels to pot and cook covered for approximately 3 minutes.

Shake pot occasionally to mix.

Add salt and pepper to taste.

Boil uncovered. Remove mussels as soon as they open. Discard any mussels that do not open.

To serve, add linguini to a large pasta bowl and gently pour the Mussels Fra Diavolo over the linguini. Sprinkle parsley on top.


You can eat this as an appetizer or serve over linguini and make it dinner. I typically eat it for dinner but it is a great starter to a meal. Yum


Friday, August 7, 2015

Coconut Blueberry Popsicles

It's the summer and I can't believe I haven't made popsicles yet. I started making popsicles because I wanted something healthy for mini me and I could use the fruit we had in our garden. We've been working really hard on our garden and within the last two years we've had a nice crop of fruits and vegetables. I was feeding the family (and the neighbors) lots of fruits and vegetables for fear of them going bad. My friend suggested I make ice pops. She said it was really easy. Half yogurt or fruit juice and half fruit. I figured I could do that... it wouldn't take that much time. So I ran with it. It took me a minute to figure out how to get it out of the mold but I did it.


It's funny how life is so connected. When I went to make these for my mini me, I must have been a little nostalgic of my life in New York City. One of my favorite things about summer when I lived there was fruit pops. I don't remember the name of the company that made them. It may not even exist anymore for all I know but I loved the coconut fruit bar and so I set out to make my own.

Side Note: These are Coconut Blueberry Pops at the request of my little one. If I had my way it would just be coconut but gotta keep the little one happy. :-)

Coconut Blueberry Popsicles

Ingredients

6 oz of Coconut Yogurt
6 oz of Blueberries
4 oz of Coconut Flakes
4 oz of Coconut Milk


Directions


Mix coconut yogurt, blueberries and coconut flakes together. Stir gently as to not break the the blueberries.

Next add the coconut milk and stir gently. Use a spoon to scoop the mixture into the mold. Leave at least 1/2 inch at the top. It allows the mixture to have room to expanded without making a mess in your freezer. With the molds I have this equals 4 popsicles.


Place the mold in the freezer for at least 5 hours.

Once the pops have set, run the bottom under warm water to loosen the popsicle.

Sit outside and and enjoy!!

Monday, July 6, 2015

Herb Marinated Grilled Steak

After a long night of good fun and great friends, nothing is better than a great meal with the family. So I was excited when hubby was able to entice my mother and father to come over for Sunday dinner. Hubby is the grill master and despite an extended weekend he hadn't spent any time on the grill. In the summer, he typically lives on the grill. There is absolutely nothing he can't accomplish on that thing. Want it cooked low and slow? He can do it. Want it seared? You got it. Perfectly cooked fish? Yup, he can do that too. Outdoor cooking is not my domain, but what he cooks is so good it makes me reconsider.

So this Sunday we were graced with steak. We don't eat steak often, so when we do it's a real treat. Unfortunately, the last two times we were out and I ordered skirt steak I was disappointed. Well, disappointed no more...hubby to the rescue.

Herb Marinated Grilled Skirt

Ingredients

1/4 cup Parsley
1/4 cup Oregano
1/4 cup Bail
2 tsp Salt
2 tsp Pepper
5 cloves of Garlic
3 Onion slices
1/2 tsp of sugar
1/4 cup olive oil
1/2 tsp Worcestershire
3 lbs Skirt Steak

Directions
Combine herbs, garlic, onions, olive oil, sugar, Worcestershire, salt and pepper in a blender. Rub mix onto steak and let it marinate for at least an hour.

Place mesquite wood logs in the grill and set it on fire. Let the grill heat to 500 degrees. If you are applying the steak directly to the flame please make sure you turn it every 2 to 3 minutes. Direct heat will allow the steak to sear which will lock in all of the flavor and keep it moist.


Cook the steak on the grill for 10 minutes. 5 minutes if you prefer your steak rare.