Replace El's Kitchen: International Comfort Food

Monday, July 25, 2016

Strawberry Lassi

During the hot summer months, it is sometimes hard to cool down. The recent heat wave has had me scrambling for ways to escape the heat. Then it clicked, I should make a lassi. My mother and I have spent many summer days indulging in lassis to beat the heat. The heat outside and of the delicious dishes we would order from our favorite Indian restaurant. Though the idea of milk and yogurt may seem like a bad combination in the heat, it's actually quite refreshing. The drink lassi comes from Northern Indian where the temperature can reach up to 123 degrees fahrenheit. If anyone knows how to cool down, it would be them. Traditionally, many Indian restaurants in America serve plain lassi or a mango lassi. Since I'm on a strawberry kick, I decided to make a strawberry lassi. Fruit is also a great way to avoid dehydrate in the summer. But that's not why I do it. I do it for the taste of it.


It's funny, a few years ago whenever I wanted a lassi, I would drive to my favorite Indian restaurant. Then about two years ago I got up the courage to ask the chef how the drink was made. And what do you know, he told me. When I realized it was so simple I kicked myself for not asking earlier. Though this is not exactly like a traditional lassi because it is not made with curd it's still pretty good. Now I get to share my good fortune with you. Hope you enjoy it as much as I do.

Strawberry Lassi
Makes 4 servings

Ingredients
9 ounces of yogurt
1/2 cup of milk
1 pound of strawberries
1 tablespoon of honey or 1/2 teaspoon of sugar
sprinkle of cardamon (optional)

Tools: Blender

Directions:

Rinse, hull and chop strawberries


Blend strawberries, honey, yogurt and milk for approximately 2 minutes

Pour into glass


Sprinkle cardamon on top if you choose

Such a refreshing way to beat the heat. What fruit would you use?

Monday, July 18, 2016

Salmon Cakes

From Japan to England there are many countries that have a version of a fish cake.  Bengali fishcakes are made with white fish and chilies.  In South America, potatoes are added. This simple more American version of a fish cake is a crowd pleaser and along the lines of something you'd see in the south. These salmon cakes are a personal favorite as far a comfort dishes go. But I'd be willing to bet that any version of this dish from any country would suit me just fine.


What warms my heart when it comes to this dish? Maybe it's the memories of salmon cakes and grits from my childhood or traipsing through the Inner Harbor of Maryland with friends making a good time of eating every fish cake we could find. Maybe that's why this is a favorite summer dish to me. Summer was when we  had the opportunity to travel and just enjoy life. What ever it may be, I always try to have some canned salmon on hand to make these delicious fish cakes. Forget all that extra breading, we want to taste the salmon.  And if made correctly there is a bit of a crisp outside that will stand up to whatever you throw at it. It's your choice how and when to serve it. Whether it's at breakfast with grits, like down South, or on a nice buttery toasted bun it's the perfect satisfying summer dish. Filling and tasty without being too heavy.

Salmon Cakes
8 patties

Ingredients

1 can of pink salmon
1 large egg (beaten)
1/4 cup of minced onion
1/4 cup of chopped green pepper
1/2 cup of bread crumbs
1/2 teaspoon of flour
2 teaspoons of parsley
4 tablespoons of vegetable oil

Tools: Cast iron pan (frying or saute pan) spatula

Directions:

Go through canned salmon and remove bones.

In a mixing bowl combine salmon, onion, green pepper, bread crumbs, flour and parsley.

Once thoroughly combined, mix in egg and a pinch of salt and black pepper.

Mold salmon mixture into patties.

Heat vegetable oil in pan on medium high heat.

Once oil is hot, add salmon patties (do not crowd the pan).

Once bottom begins to brown (approximately 4 to 5 minutes) flip salmon cakes.

Cook an additional 4 to 6 minutes until golden brown.

Serve as you like.


Friday, July 15, 2016

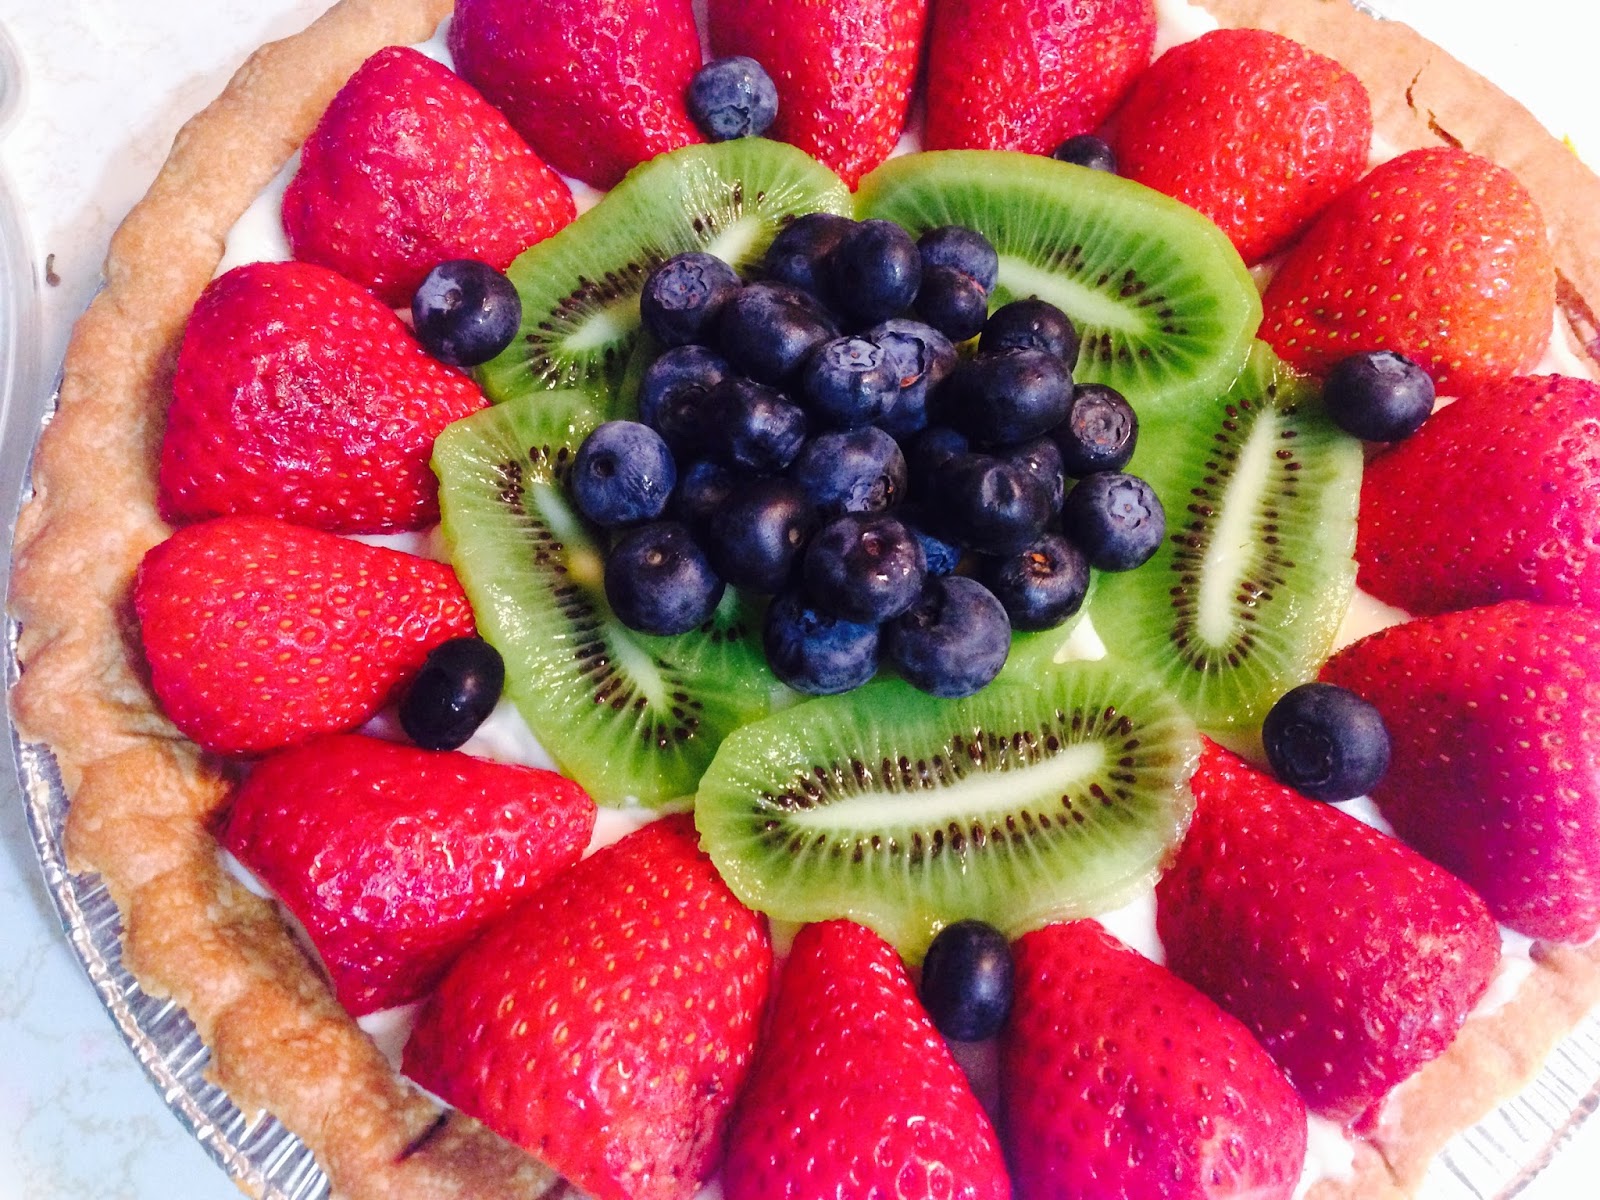
Easy Fruit Tart

Since I was young, one of my favorite desserts has been the fruit tart. Across the street my from elementary school was a delicious "French" bakery and I lived to go and get sweet treats from there. In hindsight, that owner was pretty slick. Putting a bakery, filled with buttery, sweet, delicious  foods right next to a school.


Ever since then, I have been in love with fruit tarts. This sweet French pastry hits the spot when I'm wallowing in the midst of my own despair (I know dramatic right). But sweets make everything better right? At least temporarily. Whether it's the Spanish, French or Italian version of this type of dessert, it's everything you need. In the past, I wouldn't even think to make a dessert like this for fear it would be too difficult. But behold a simpler way to make this French classic.

With some adjustments to the filling, you can create a tart similar to this French dessert. Best part is that it's so simple you can make it with your friends and family since there's very little stove time. By substituting cream cheese for the classic milk and egg custard, anyone can help prepare this sweet treat. The kids, your girlfriends even people who can not cook, can still help. You can use my quick pie crust recipe or a frozen pie crust from the grocery store. Add whatever fruit you'd like and you too can enjoy this play on a French classic whenever you please.

Fruit Tart
Makes 2 Pies (8 servings per tart)

Ingredients

Pie Crust Recipe

Filling
2 - 8 ounce bars of cream cheese
1/2 cup of heavy cream
1 cup of sugar
2 teaspoons vanilla extract
2 cups of strawberries
1 cup of blueberries
4 kiwis sliced

Glaze
1 1/2 cups of water
1 cup of sugar
1 teaspoon of lemon juice
1 teaspoon of lemon zest

Tools: Mixer, spatula, 2 pie plates (foil pie dish)

Directions:

Frozen pie crust:
Unthaw then use a fork to poke holes in the bottom of the pie crust. Bake according to directions.

Scratch Pie Crust:

Pre heat oven to 375 degrees F.

Roll out dough. Place pie plate upside down on dough making sure dough is rolled thin enough for two pie crusts.

The cut out of dough should be 4 to 5 inches larger than the pie plate.

Place dough in pie plate and gently press evenly into the bottom and sides.

Leave a half inch border then trim excess off the sides and crimp the sides.

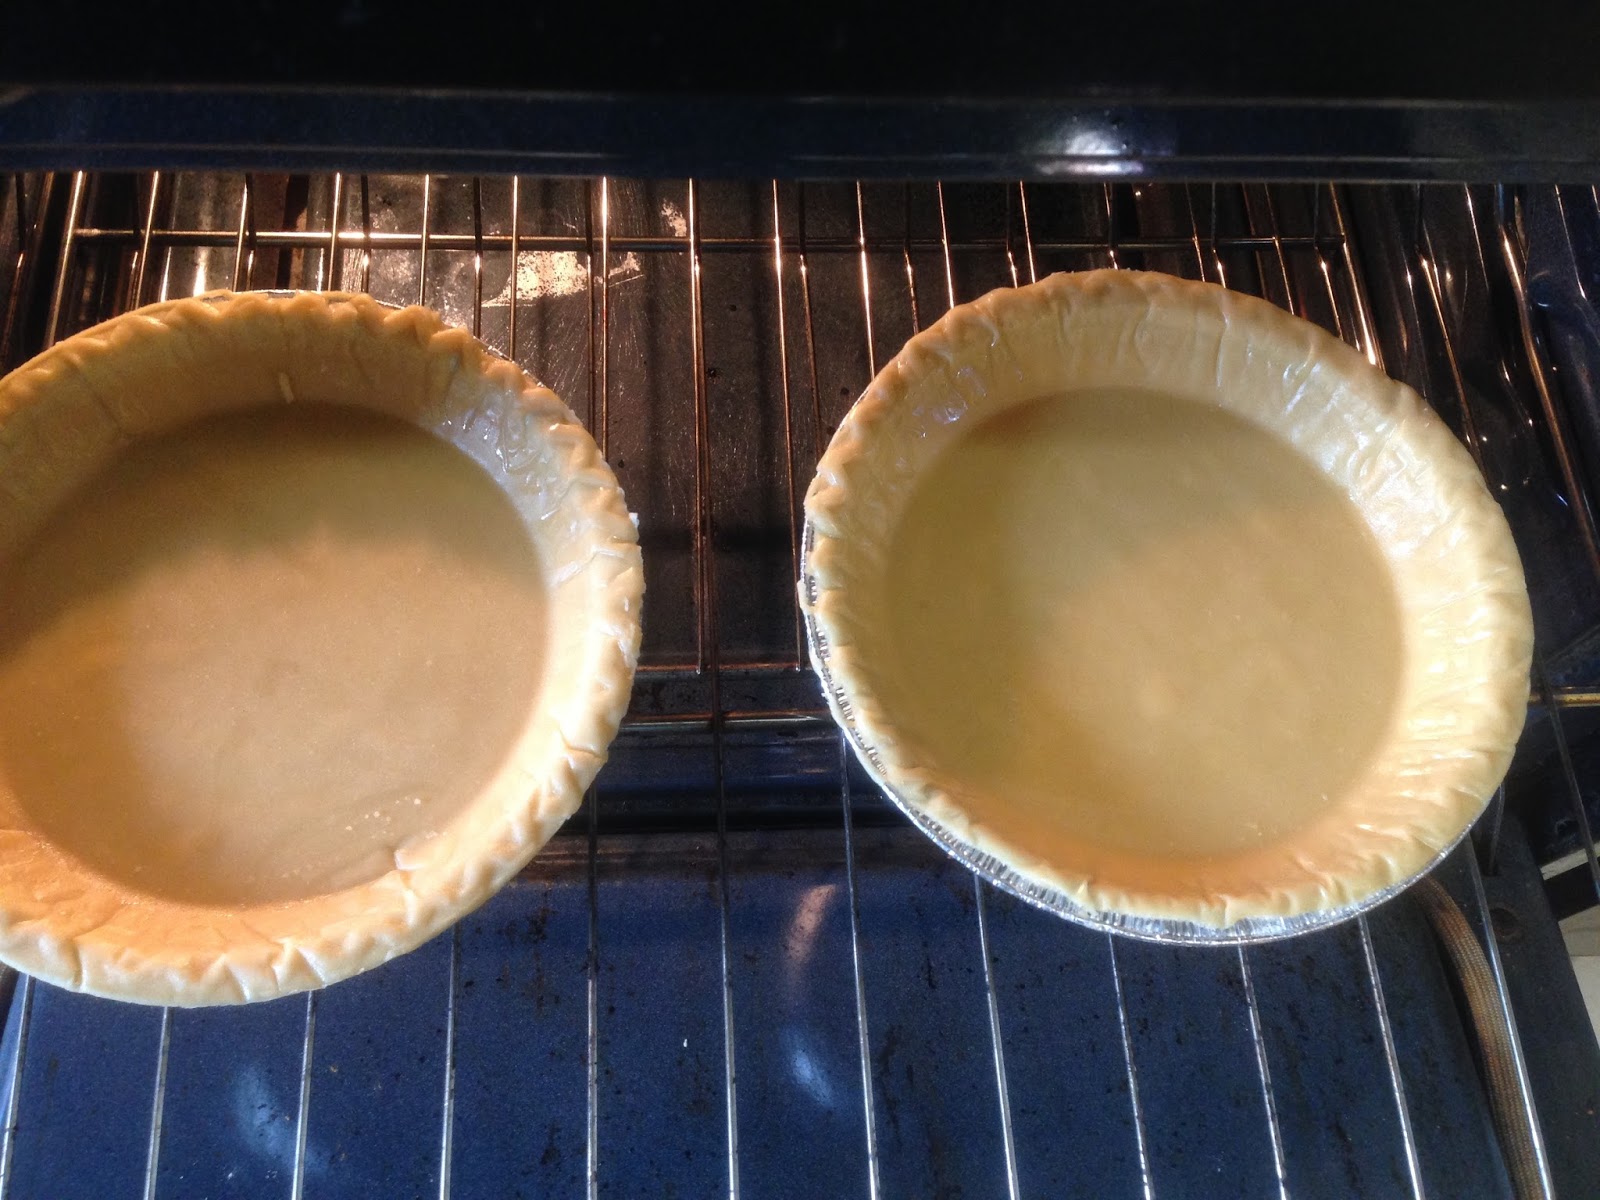
Place a piece of parchment paper inside the pie crusts and place a handful or two of dried beans/lentils on top (this will help the crust stay firm once we  add the custard and glaze).

Bake at 375 degrees F on the middle rack for 15 minutes or until lightly brown.


Remove parchment and beans and allow crust to cool.


In a bowl combine, cream cheese, sugar, vanilla and heavy cream.

Using a mixer beat until smooth.


With a spatula, begin to scoop equal amounts of cream filling into cooled pie crusts.

Refrigerate until firm. About 30 minutes.

Place fruit over cream filling.


In a small saucepan add water, sugar, lemon and lemon zest. Bring to a boil over medium high heat.

Allow water/sugar mixture to reduce into a syrup like consistency. Approximately 15 to 20 minutes
(1 tablespoon of cornstarch can speed up the thickening process).

Allow glaze to cool. Once cooled, brush glaze on top of tart.

Refrigerate for at least 20 minutes before serving.

Enjoy with friends and family. I'm sure everyone will leave with a smile.

Monday, July 4, 2016

Cookie Bottom Cheesecake Squares

Happy 4th!! So it's technically not cheesecake season and this isn't your typical 4th of July dessert but I made one anyway. Though cheesecake is typically our fall sweet treat, I'd say cheesecake knows no season. You should be able to have comfort food when ever you crave it. So when my mom asked me for a cheesecake with an oreo cookie bottom for her birthday, I had to oblige. This recipe is simple. No fancy tools required. Just a hand mixer and something to smash some cookies. In addition to being simple, it's made with reduced fat ingredients so you don't have to feel bad eating it. Don't feel the need to follow in my footsteps though.  I only made it with reduced fat ingredients because I was asked. Of course,  if you do use low fat cream cheese and reduced fat oreos you might want to add  some additional oreos to the top of your cheesecake. Yes ... know you want to.


Cookie Bottom Cheesecake
Makes 12 Squares

Ingredients

16 - 20 oreo cookies
4 tablespoons of butter (melted)
3 (8 ounce) packages of cream cheese
1 cup of  sugar
1 tablespoon of vanilla
3 eggs

Tools: 8 x 8 pyrex dish, hand or stand mixer
Optional -food processor, parchment paper

Directions:

Preheat oven to 350 degrees F.

Place parchment paper cut to the size of the dish in the bottom of the pyrex

Crush oreo cookies

Add butter to crushed oreo cookies. Mix well

Press oreo mixture into the bottom of the pyrex dish.

Make sure it is spread evenly.

Add cream cheese and sugar to a medium bowl/stand mixer and mix until smooth.

Blend in vanilla.


Add eggs, one at a time.

Mix just until incorporated (do not over mix)

Pour cream cheese batter over oreo crust

Bake for approximately 45 minutes until to edges are firm.

Turn oven off and allow cheesecake to sit in oven for an additional 15 to 30 min (this should help prevent cheesecake from cracking).


Chill in fridge until ready to serve.


Monday, June 20, 2016

Lemon Palmiers

It's sumer and I've had my eye on a delicious pastry, a palmier. It's a French pastry that can be adopted to be either sweet or savory. It's not the typical sweet comfort I look for, but in the summer you don't always want something super sweet. It was probably best since I decided to make them with my little and he really doesn't need anything sweet ever (energy for days).


One of the best parts of making this dessert (besides eating it) is making it with someone. For this one, everyone was in the kitchen which made it hectic but lots of fun. Of course, that's what summer is like in my house. Lots of fun and silliness.  Giggles and snorts always bring a smile to my face. I guess the nickname of "French  Hearts" is also very fitting.

This dish is made super easy by using pre-made puff pastry. I also decided to breakout the ninja to create some lemon zest from the peel. When zesting, remember you only want the yellow part of the lemon. It's fine if you don't have a zester. You can use a peeler, grater or pairing knife to take the skin off.

Ingredients:

Puff Pastry
1 teaspoon lemon zest
1 teaspoon lemon juice
4 tablespoons sugar


Directions:

Preheat oven 375 degrees

Mix zest, lemon juice and 2 table spoons of sugar together.

Sprinkle a flat surface with 1 tablespoon of sugar.

Place defrosted puff pastry on a flat surface.

Roll pastry into a square on top of sugar.

Brush/ Sprinkle zest and sugar mixture on to puff pastry dough.

Gently roll the sides of the square pastry dough toward the middle.


Try to make sure the sides meet exactly in the middle.

Slice about 1/2 inch thick and place cut side up on the baking sheet (parchment paper).

Sprinkle with remain gin sugar.

Bake for 6 minutes. Palmiers should be caramelized and lightly browned. Turn and bake for another 5 to 6 minutes.

Transfer to a baking rack to cool.


Hope you have fun making this with your friends and family. I know I can't wait to make a raspberry version of this sweet treat.

Monday, June 13, 2016

Flan

Sweet caramel, deliciousness. That's what I think of when I think of flan. I have no idea when I 1st had flan but what I do know is that I like it so much I'll eat anyone's flan. Yes, even the over processed stuff that comes in plastic cups in the supermarket. I'll admit it, it's one of my weaknesses. The nerd in me wondered, how is this a Latin American dish? Custard makes me think Europe. And what do you know flan is from Europe. Originally Rome, then eventually making its way to Spain (with some alterations). The european version is more of a savory dish where as the Latin American version is sweet and filled with local flavors like coffee. It's the Spanish version I like because this version is topped with caramel.


I love this dessert.  For me one of the most important aspects of it is its smooth texture. A good flan has a silky smooth texture and the caramel is sweet without making your teeth hurt. Of course, that is the hard part. Mixing just enough and not to much. My tip do not overheat the pan when making the caramel. I am not a very patient person and it took me a very long time to learn. Low and slow.

We've always had access to whether homemade or store bought and so I never really thought about making it myself. Of course, things change and I realized I needed to make it just for my own edification. I figured, if I can make creme brûlée, I can make flan. So let's do this

Flan


Makes 8 - 10 servings

Ingredients:

4 eggs
1 can sweetened condensed milk
1 can evaporated milk
1 teaspoon vanilla
1 1/2 cups sugar
2 tablespoons of water
salt

Tools:
large roasting pan
saucepan
6 ramekins or glass baking dish

Directions:
Preheat oven to 325 degrees.

Pour 1 cup of sugar and water in a sauce pan over medium high heat. Don't walk away. Stir, stir, stir.

Once you've achieved a brown caramel, remove the pan from heat. Quickly pour the caramel into ramekins or

Tilt and swirl caramel so that all parts are covered

In a bowl whisk or blend together eggs.

Mix in sweet condensed and evaporate milk slowly. Add sugar, vanilla and a pinch of salt.

Strain through a sieve (helps to get rid of bubbles).

Place ramekins or large glass baking dish filled with 2 inches of water.

Pour milk and egg mixture in ramekins/dish on top of caramel.

Bake for 45 minutes in the water bath .

Gently check center of flan with knife. If it comes out clean it's done.

Remove from oven and let flan cool. Then place in refrigerator for 1 hour.

Run a knife or spatula around the edge of the flan to make it easier to remove.

Invert on to a plate, caramel sauce will flow over custard.


So much better than store bought!! Stick extra in the fridge covered with plastic, though it probably will be gone within 2 days.

Monday, June 6, 2016

Sausage w/spinach, mushroom and tomatoes


So, I used to think adding vegetables made a dish healthy. When my husband and I first decided we were going to lose weight together, we used Dr. Ian's Fat Smash diet. I'm sure we both thought our worlds were going to fall apart. Him because there was no meat for the first part of the diet. Me because I didn't know white rice was bad (heck, it tastes so good). These are the foods we grew up eating, and we realized we had a lot of bad eating habits we had to change. That might be why I now try to throw vegetables in a dish anytime I can.


One go to dish before my epiphany was Italian sausage and peppers over pasta. It was quick and satisfying. Of course, as we became more selective with our food choices, I decreased the amount of sausage and increased the number of vegetables in this dish. As I continued to try to make my "go to" healthier,  I learned mushrooms add a bit of protein, Vitamin D and are great for your metabolism. Spinach adds vitamin C, Vitamin K, folate and a whole bunch of other nutrients. Hmmm, that's why this dish is just the right amount of wrong and right. The sausage provides the old school comfort you want from sausage and peppers and the vegetables provide great health benefits. Comfort food doesn't always have to make you feel guilty or be bad for you. Yay!!

Sausage with spinach, mushroom and tomatoes

Makes 6 servings

Ingredients:

1 pound of italian sausage
1 medium onion(sliced)
4 cloves of garlic (minced)
2 roma tomatoes(quartered)
12 ounces of mushroom (sliced)
10 ounces of spinach
1 teaspoon of dried basil
1 tablespoon olive oil
salt and pepper to taste.

Tools: cast iron pan

Directions:

Place sausage in cast iron pan over medium high heat and cover with water.

Boil sausage for approximately 8 to 10 minutes.

Remove from pan and allow sausage to cool. Once cooled slice diagonally.

Return sausage to pan and allow to brown. Remove once sausage is brown and full cooked

Heat olive oil in pan, add sliced onions, garlic, mushrooms, and tomatoes. Cook for  2 to 3 minutes.


Add spinach, dried basil and stir allowing mixture to cook for  2 to 3 minutes.

Return sausage to pan with vegetables. Reduce heat to low and allow to cook for 10 to 15 minutes while flavors meld.

Add salt and pepper to taste.


If you care not for guilt, add pasta and parmesan or mozzarella cheese to this dish and enjoy.