Replace El's Kitchen: International Comfort Food

Thursday, September 10, 2015

Ham & Cheese Egg Muffins

It's back to school and around this time of year I try to do everything possible to make life a little easier in the morning. Many days we're a fine line between being on time or an hour late to work. It all depends on what time we get out of the house. So in addition to trying to pack everything up the night before, I decided it would probably be helpful to have a breakfast we could eat on the go. My choice this week was egg muffins.


I love this dish because there's not a lot of prep time which means I can spend Sunday doing something else, like preparing dinner for the week or spending time with family. It's also great because you can use it to get rid of the little bit of cheese (or other items) that always seem to be left behind after making something.

Of course, I am the main culprit of not eating breakfast in the morning (and almost being late) so having these in the fridge leaves me few excuses. Mix and match the ingredients and see what works for you. It's a quick fix for the morning rush.

Ham & Cheese Egg Muffins
Makes 6 servings

Ingredients
8 eggs
1 cup of spinach
6 slices of Virginia Ham
1/2 cup of milk
4 ounces of Vermont white cheddar cheese
4 slice of swiss cheese
sprinkle of salt and pepper

Cookware Needed: cupcake tin


Directions

Preheat oven to 350 degrees. Spray cupcake tin with olive oil or grease with butter.

In a large bowl whisk together eggs, salt and pepper. Then add in milk.

Dice ham and cheese and add to mixture. Mix with a fork until thoroughly combined.

Next add salt to spinach, then add spinach to egg mixture. 
*Hint: If using frozen spinach unthaw and squeeze water out before adding to egg mixture.


Spread mixture evenly among cups and bake for 20 minutes or until done.

Store in the fridge and reheat in the microwave. Yum. Hand held food. It always taste better when you eat with your hands!!

Tuesday, September 8, 2015

Corn Chowder

I thought about writing the intro to this like a rap song. It's an ode to another time in my life ... college. I've had many conversations with my friends about how we miss Maine. So when I saw Rachel Ray making Fish and Corn Chowder the way people in New England make it, it made me reminisce. There are some dish that are just made better in New England. I found that out when I tried to order a lobster roll and was fed a cold lobster sandwich with mayo.


When I decided to try this recipe I knew I had to enlist the help of a very truthful friend. There are a couple of friends I know I can ask when I'm trying recipes out and I was lucky enough to have my girlfriend come over and be a guinea pig. But I had to make some adjustments. She doesn't eat pork and seafood is a no, no too. But I really wanted to make this dish. I had been craving a new England dish since we cancelled our trip to Maine.

Luckily, I figured it out. No epi-pens needed. Whew. Though I may try this dish again, with pork bacon and crab. I will continue to add additional potatoes and corn starch (or maybe flour) because I like my chowder thick.

But back to my initial thought... I have to go with it. For my friends that do not eat pork
"This goes out to you. This goes out you. This goes out to you, and you and you..."

Corn Chowder
Makes 6 servings

Ingredients
1 tablespoon of olive oil
2 ribs of chopped celery
1 heaping tablespoon of minced garlic
1 diced onion
2 bay leaves
2 tablespoons of thyme
1 teaspoon of paprika
4 slices of turkey bacon
4 ears of corn (kernels removed)
4 red potatoes diced
1 cup of heavy cream
1 cup of almond milk
2 cups of chicken stock
1 tablespoon cornstarch
Salt and ground black pepper

green onions - optional
sriracha - if you like spice it's really good -optional
chicken or Crab -optional

*Note: You can eat this dish by itself or add crab or chicken. It is also ok to use seafood stock instead of chicken stock. It's your preference.


Directions:

Pour a tablespoon of olive oil into a large pot over medium heat. Allow the pot to get hot then add bacon. Allow the bacon to brown and crisp.

Once the bacon is crispy, add celery, onions, garlic, bay leaves and thyme. Once onions and garlic begin to brown use a paddle or spoon to scrape the bottom of the pot.

Add the corn, potatoes and paprika to the pot and cover. Allow everything to cook for 5 minutes.

Then add chicken stock to the pot and allow to simmer for 10 minutes.

In a separate pan on medium low heat, allow butter to melt and add heavy cream.

Then add cornstarch and whisk together until mixture is thoroughly combined. For even thicker chowder add flour. Add mixture to corn and potatoes, then add almond milk.

Allow chowder to simmer on medium low heat for another 10 minutes.

Salt and pepper to taste. The amount of salt you add greatly depends on how salty your bacon is.

Hope you enjoy it as much as we did.


Thursday, September 3, 2015

Tiramisu Cheesecake

I try to make really special cupcakes for my teachers' assistants. It's my way of showing them I am thankful for all of the help they give me during the school. Since it was my birthday...Woo Hoo,  I decided to make something special for myself.


The cupcake that was the biggest hit with my TAs was the tiramisu cupcake. I'm not sure whether it's the drizzle of coffee over the cupcake (yes, I'm sorry... I give my students coffee... They drink it anyway) or the mascarpone whipped frosting on top. Either way, it's not too sweet and totally delicious. 

I knew I didn't want cupcakes and the bakery near us has a wonderful tiramisu cake so I wasn't going to make that. Then it came to me tiramisu cheesecake. Of course, then I had to figure out how I was going to make it. It might sound weird, but people make cheese cakes many different ways. The base is always cream cheese but some people add sour cream or heavy cream. It depends on what you like. So then I had to figured out whether I was going to add sour cream or heavy cream. Use lady fingers or a cookie crust and so on and so forth.

In the end, I decided I would use lady fingers because what is tiramisu without lady fingers? I also decided to add sour cream. Typically, I would not add sour cream to my cheesecake mixture but I really wanted it to be light despite all of the layers and elements.

Tiramisu Cheesecake
Makes 12 servings

Ingredients
6 oz Lady Fingers
3 packages of 8oz cream cheese
8 oz of tiramisu mascarpone

½ cup of sour cream
1 cup of sugar
1 tablespoon of vanilla
4 tablespoons of flour
3 eggs
½ cup of Kahlua
½ cup of strong coffee

½ cup marsala wine
4 tablespoons of butter
4 tablespoons of cocoa powder for dusting
pinch of salt

Supplies: Mixer and spring form pan.

Directions

Preheat oven to 350 degrees.

Place a large oven safe pan of water in the bottom of the oven.

Remove cream cheese from the refrigerator to soften. Grease spring form pan with butter.

Warm coffee, Kahlúa (or any coffee liquor) and marsala wine in a pot until it begins to boil. No worries moms ...cooking helps to intensify the overall flavor and boils off the alcohol. 

Let the mixture cool.

Place ½ of a cup of coffee mixture aside to incorporate into cream cheese mixture later.

In a bowl or stand mixer add cream cheese and sugar; on medium speed mix until smooth (about 4 minutes).

Scrape the sides of the bowl. Add marscapone, sour cream and vanilla; mix for another 4 minutes. 

Scrape the bowl, add flour and a pinch of salt; mixed until well combined. 

Lastly add eggs one at a time and mix on medium speed. 

Scrape the sides of the bowl. If you are using a stand mixer make sure you scrape the bottom of the bowl. Large clumps of cream cheese sometimes are hiding there.

 Then add coffee mixture and blend until incorporated.

Dip the lady fingers in coffee mixture. Be careful not to drown the lady fingers. If left too long the biscuits will absorb all of the liquid. Press the lady fingers into the bottom of the springform pan.

Place remaining lady fingers along the side of the springform pan with the flat side facing inward. Space lady fingers evenly apart around the sides of the pan.

Finally, pour the cream cheese mixture into the springform pan.

Bake the cheesecake for 45 minutes until the edges have set and the center jiggles just a little.

Turn the oven off and open the oven door. Allow the cheesecake to sit in the oven for an additional 20 minutes.

Let the cheesecake cool in the fridge for at least 4 hours.


I was pleasantly surprised with this recipe. The sour cream really did make it nice and light and the flavors were perfect. Nothing too over powering and a velvety texture. Happy Birthday to me!

Monday, August 31, 2015

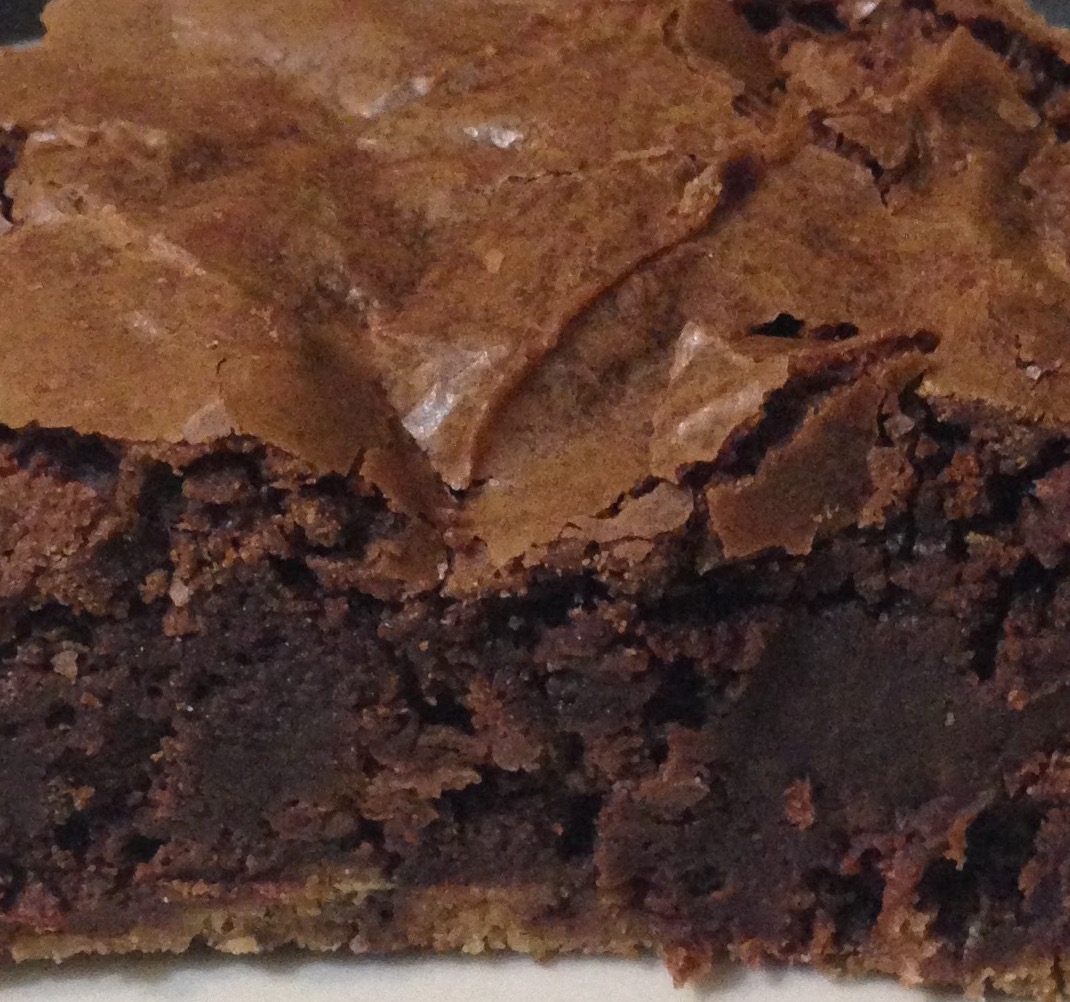
Indulgent Brownies

These brownies are ridiculous. One of my students made a version of this for me in cooking class. I was pregnant at the time and it seemed as if it was her mission to see how much she could feed me. It was sweet, my students wanted to take care of me. So these brownies have a special place in my heart. It's always nice when someone does something just because they think it might make you happy.


The original recipe is just a mixture of cookies and brownies. Since I tend to overdue it, I'm going to add an additional level by adding chocolate chips to the batter which is also made out of chocolate chips. I typically add walnuts to my brownies but I knew I would be giving these away and I was worried about nut allergies. I'm a big fan of using what is already in the house so this recipe is right up my alley. I'm not sure how it happened but there seems to be an over abundance of chocolate and chocolate chips in the house.

Indulgent Brownies

Makes 9 Brownies

Ingredients

12 cup of sugar
2 tablespoon of butter
2 tablespoon of milk
12 cups of semisweet chocolate chips
2 eggs (room temperature)
1tsp of vanilla extract
 23 cups of all purpose flour
1tsp of baking soda
12 tsp of salt
12 chocolate chip cookies
1cup of chocolate chips

Directions

Preheat oven to 350 degrees. Grease an 8 x8 inch square pan.

On low heat in a medium saucepan combine sugar, butter and milk until boiling.

Remove mixture from heat and add chocolate chips until melted and smooth.
Let the mixture cool.

While chocolate is cooling, combine flour, baking soda and salt in a separate bowl.

Add eggs and vanilla to chocolate mixture. Then add flour mixture.

Chop the chocolate chip cookies into small chunks. Place the chopped cookies on the bottom of the greased pan.

Sprinkle chocolate chips into brownie mixture and pour over cookies. Spread mixture evenly in the pan.

Bake for 25 to 30 minutes. Remove pan and let cool for an additional 20 minutes.


Cut into squares  or rectangles and enjoy.


Thursday, August 27, 2015

Baba Ghanoush

Must be in the mood for Middle Eastern food this week. We've made all types of dishes this week and I'm kind of in the mood to just snack. Luckily, I can turn to the garden for a little healthy snack. I've been waiting for my eggplant to get a little bigger and considering my current taste buds I know exactly what I should do with it. It's baba ganoush time.


I used to eat this like a meal. One of my favorite restaurants makes a whole baba ghanoush platter with salad, pitas and lots of accouterments. Yum baba ganoush with all the fixin's. Ah good times.

Baba Ghanoush

Ingredients

3 white eggplants
3 cloves of garlic
¼ cup tahini
1-2 tbsp olive oil
¼ tsp salt
¼ tsp cumin
¼ cup lemon (2 lemons)
parsley


Directions:

Preheat oven to 375 degrees.

Place eggplant and garlic on baking sheet. Poke the eggplant with a fork, drizzle with olive oil and sprinkle with kosher salt. Roast eggplant and garlic for 30 mins or until eggplant is soft.

Let the eggplant cool.


Meanwhile chop parsley and juice lemons.

Combine lemon juice, cumin, salt and tahini.

Scoop out the flesh of the roasted eggplant and place it into a food processor with the garlic and the tahini mixture.

Pulse into a coarse mixture; then begin to add the olive oil. The mixture should begin to become smooth. Continue to pulse and add olive oil until desired smoothness.

Sprinkle parsley on top.

Traditionally this would be served with pita bread but for my gluten free friends it's also great with cucumbers and tomatoes.

Enjoy!


Monday, August 24, 2015

Sweet Coconut Sticky Rice

My family might be done with me. We are in the heat of the summer and I continue to turn the oven on. I understand. It makes the house hot but I really like cookies and cupcakes. So I asked myself, what sweet treat would really hit the spot but doesn't require me to turn the oven on?

Then I remembered, the stove top dessert that would satiate my sweet tooth...Sweet Sticky Rice. There's a wonderful Thai restaurant where we used to live and it made an awesome coconut sweet sticky rice. The restaurant made it with Thai Sweet Rice but I'm going to use what I have in my kitchen.

It's a great dessert and it's not too sweet. It's served plain in the restaurant  but I'm going to add fruit or maybe raspberry gelato once it's finished. I'm excited. I've made everyone happy and I still get something sweet. Whoopee!

Sweet Coconut Sticky Rice
Makes 6 servings

Ingredients

1 cup of short grain white rice
1 cup of water
2 cups of Thai coconut milk/ 2 cans (not Lite milk)
1 cup of sugar
1 tablespoon of coconut flour (you can use cornstarch or tapioca flour)
1 cup of shredded coconut
¼ tsp of salt
fruit ( mango or strawberries)

Garnish: Mint

Directions

In a saucepan combine water, 1 cup of coconut milk and rice. Bring mix to a boil.
Reduce heat to medium low and cook for 15 to 20 minutes.

While rice cooks, heat 1 cup of coconut milk in a heavy pot on medium heat. Bring milk to a low boil.

Once boiling, add 1 cup of sugar and ¼ teaspoon of salt and stir. The heat will help the sugar and salt dissolve quicker.

To the above mixture whisk in flour (this will help it thicken). This step can be omitted if you are using sticky rice.

Once rice is soft but firm pour the coconut, sugar, flour mixture over it.

Add ½ a cup of coconut flakes to sweet rice mixture. Make sure mixture is thoroughly combined.

Refrigerate mixture for ½ an hour to 1 hour.

While rice is cooling, cut fruit and toast coconut flakes.

Place remaining ½ cup of coconut flakes in a non-stick pan on the stove at medium heat and toast until lightly browned.

When you're ready to serve, scoop about ½ a cup of rice into a single serving dish, sprinkle with toasted coconut and place fruit on top.


There you have it. A sweet treat without the heat.


Thursday, August 20, 2015

Spiced Cake Pops

Every wonder what to do with leftover cake crumbs? After I made the Apple Pie Cupcakes I had cake crumbs from the centers I removed. I know at times, it seems as though I'm joking when I talk about recycling bacon grease and being environmentally friendly but I'm actually really serious. These are not jokes. If we can reuse it or recycle it we do.


So I had to find something to do with the crumbs. Hello spiced cake pops. Cake pops are great because it allows me to use any left over cake and icing I might have and it's bite sized.

Spiced Cake Pops

Makes 8 cake pops

Ingredients

1/2 cup cake crumbs
1 tablespoon of cinnamon frosting
1 cup of white morsels or 4oz of candy melts
splash of heavy cream

8 Lollipop Sticks

Optional: Sanding sugar, sparkle gel or sprinkles for decoration.

*Note: I'm using white morsels because I have it in the house. White chocolate melts or white bakers chocolate is much easier to work with and dries quicker. You also won't need to use as much of it.

Click for the Spice Cake Recipe and Cinnamon Frosting recipe.


Directions:
Crumble spice cake in a bowl. Add about a tablespoon of frosting. Mix thoroughly using your hands or a fork.
You don't need a lot of frosting. Just enough to hold the cake together.

Using a round tablespoon, scoop the cake & frosting mixture into balls.

Once you have your cake balls. It's time to melt to chocolate. 
Melt the chocolate in the microwave for 30 seconds, until smooth. 

If you are using morsels after the first 30 seconds stir and microwave for another 30 seconds. It should take you no longer than 2 minutes to get a smooth consistency.


Dip the tip of the lollipop stick into the melted chocolate, then into the cake ball.

Place the cake pops on parchment paper and let them set in the freezer for at least 30 minutes.

Remove the cake pops from the freezer and remelt your chocolate. Dip the cake into the melted chocolate and turn to coat evenly. Twirl the cake pop gently until the chocolate begins to set.

*Note: I coated the pops twice. The second time using chocolate with a splash of heavy cream in a double boiler (glass bowl over a pot of water). It created a smoother coating for my cake pops. That option resulted in a much longer time twirling the coating onto the cake pop waiting for it to dry.

Place the coated cake pops on parchment paper or stick the lollipop ends in a piece of styrofoam and place it into the refrigerator.


Before I was finished some cake pops were confiscated... so it must be good.