Replace El's Kitchen: International Comfort Food

Tuesday, October 25, 2016

"Pumpkin" Deviled Eggs

Halloween is right around the corner and the topic of discussion is "what are you bringing to the kids Trunk or Treat or Halloween party". There are so many options but depending on the rules and regulations for your child's school you may be limit in what you can buy or bring. This year I don't have to worry about accommodating anyone but my friends and family. So I'm planning on making one of my favorite dishes, perfect for any get together. Deviled eggs. It's hand held and tasty. Not to mention much better than a regular boiled eggs. In my filling I'm adding spicy mustard to give it a little kick. The filling for a deviled egg is very versatile. I love adding bacon and small chunks of jalapeño when I don't have to worry specific palettes.


With no restrictions, it's even easier to get into the Halloween spirit. It of course doesn't hurt that this dish is so easy to alter and easy to make with your children. I'm adding some orange food coloring to make the egg yolk filling look more like a pumpkin. And my little one is acting as sous chef mixing it up for me. With some red food coloring and olives you can make them look like scary eyes. Let's be honest, one of the best parts of the holidays is spending time with family and eating lots of food. So let's have some fun with it.

Deviled Eggs
Makes 12 deviled eggs

Ingredients
6 eggs
1/4 cup of mayo
1 teaspoon spicy mustard
1 teaspoon sweet relish
1/8 teaspoon of salt
fresh pepper
paprika for garnish
parsley for garnish

Optional: orange food coloring

Directions:

Place eggs in a saucepan and cover with cool water. 
Place pan on high heat and cook until water comes to a rolling boil.
Remove pan from heat and set aside for 12 minutes.
Remove eggs from water and gently tap the tip of the egg on counter to crack shell (if having trouble place egg under cool water or submerge in ice water).
Peel eggs. 
Slice eggs in half from top to bottom.
Remove yolks from whites and place in a bowl.
Mash yolks with a fork.
Add mayo, mustard and relish. Then mix and mash until smooth.
Add salt and pepper.


If making for a holiday add food coloring
Spoon a tablespoon of mixture into egg white and garnish


Tuesday, October 18, 2016

Coffee Creme Brûlée

Has there ever been a dish that you loved but you just didn't believe you could make it yourself? Creme brûlée was that dish for me. I feel like it is one of the ultimate decadent desserts. So for years I was hesitant to make it. Of course, once I finally had the gumption to do it, I tried to follow the recipe exactly. And what was the result you might ask? Even though I followed the recipe exactly, my brûlée did not look like the one in the picture. It just wouldn't set up. So, I put it back in the oven to cook a little longer. I don't know how many times I ended up putting it back in but it was more than once. When it was finally done, it was delicious. Minus the little timing mishap, it was all okay. I learned two important lessons that night,

1) the whole fantasy of timer on the oven going off exactly as everyone is done with their main course is just that, a fantasy for t.v. and movies. That doesn't happen in real life.
2) directions are meant as a guide. We live in different places with different altitudes and have different stoves/ovens etc. Which means sometimes you have to wing it.
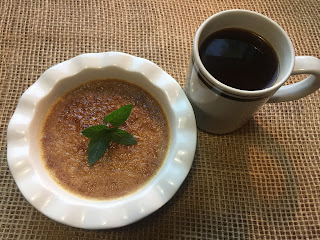

Why was I so afraid? Probably because it is one of my husband's favorite desserts or it's one of those dishes served in fancy restaurants. Whatever the reasoning, I didn't want to mess it up (I hate failing). And of course, I didn't make it before this big dinner with our friends. So, I was embarrassed that people had to wait for dessert (actually now that I think about it... the whole dinner might have been late). But now that I've made it a couple of times I think I'm ready to take it up a notch. Coffee Creme Brûlée. This is the ultimate test because now I'm combining hubby's fav dessert with one of his favorite drinks. But I love mash-ups. Just the idea of creme brûlée, a classic French dessert, mixed with frenzy of coffee. The sustenance of most people's daily existence. So popular it's one of the beverages in the book The World In 6 Glasses, where Brian Hedweck lays out how coffee changed the world.

Millions of people think that they can not live without it. In a national coffee survey approximately 53.9% of people would give up their cell phone before giving up coffee(see coffee survey). Really? I don't believe it but maybe this combo of coffee and creme would make me give up mine. What do you think?

Coffee Creme Brûlée
Makes 6 servings

Ingredients
1 cup white sugar
3 tablespoons of sugar
6 egg yolks
1 teaspoon vanilla
3 cups of heavy cream
2 teaspoons instant coffee

Tools needed: 6 ramekins or oven safe bowls, baking pan, wire rack ( no torch needed)

*Note: I'm using ramekins that are 6 inches in diameter and a bit deeper. Most creme brûlée ramekins are wider and flatter. This will change the cooking time.

Directions:
In a medium pot over medium high heat, bring cream, coffee and vanilla until coffee dissolves. About 2 minutes.

Remove pot from heat and let it come to room temperature. Approximately 1 hour.

Preheat oven to 325 degrees F.

In a large pot over high heat boil 1 1/2 cups of water.

In a large bowl, whisk yolks with 1 cup of granulated sugar (the finer the better) until thick and a pale yellow.

If any foam has developed on the top of the heavy cream mixture skim it off.

Using a spatula, stir in cooled cream (try not to create bubbles or froth) until fully mixed. This helps to give you a nice smooth top to the custard mixture.


Evenly divide custard mixture into 6 ramekins.

Place ramekins in pan and gently pour hot water into baking pan - at least half way up the side of the ramekins.

Bake custard mixture until set on the outside and a little jiggly in the middle - about 45 minutes to 55 minutes.

Allow custard to cool down in water bath.

Once completely cooled, cover with plastic wrap and put in fridge. The mixture will continue to firm in the fridge.

Once ready to serve, preheat broiler.

Remove custard from fridge and blot away any moisture with a paper towel.

Evenly sprinkle 1/2 a tablespoon of sugar on the top of each custard and place in oven on broil.

After about 2 minutes sugar should begin to boil and turn a deep brown.This process can take up to 5 minutes if the rack is in the middle of the oven.

Remove from oven and place back on wire rack.

Wait for sugar to harden then serve.


Want to jazz it up a bit?

Serve with a little bit of whipped cream and a sprinkle of cinnamon.

How do you like your creme brûlée? I'm thinking maybe chocolate next time!


P.S. If you are wondering what to do with all those egg whites, try this Belgian waffle recipe.


Tuesday, October 4, 2016

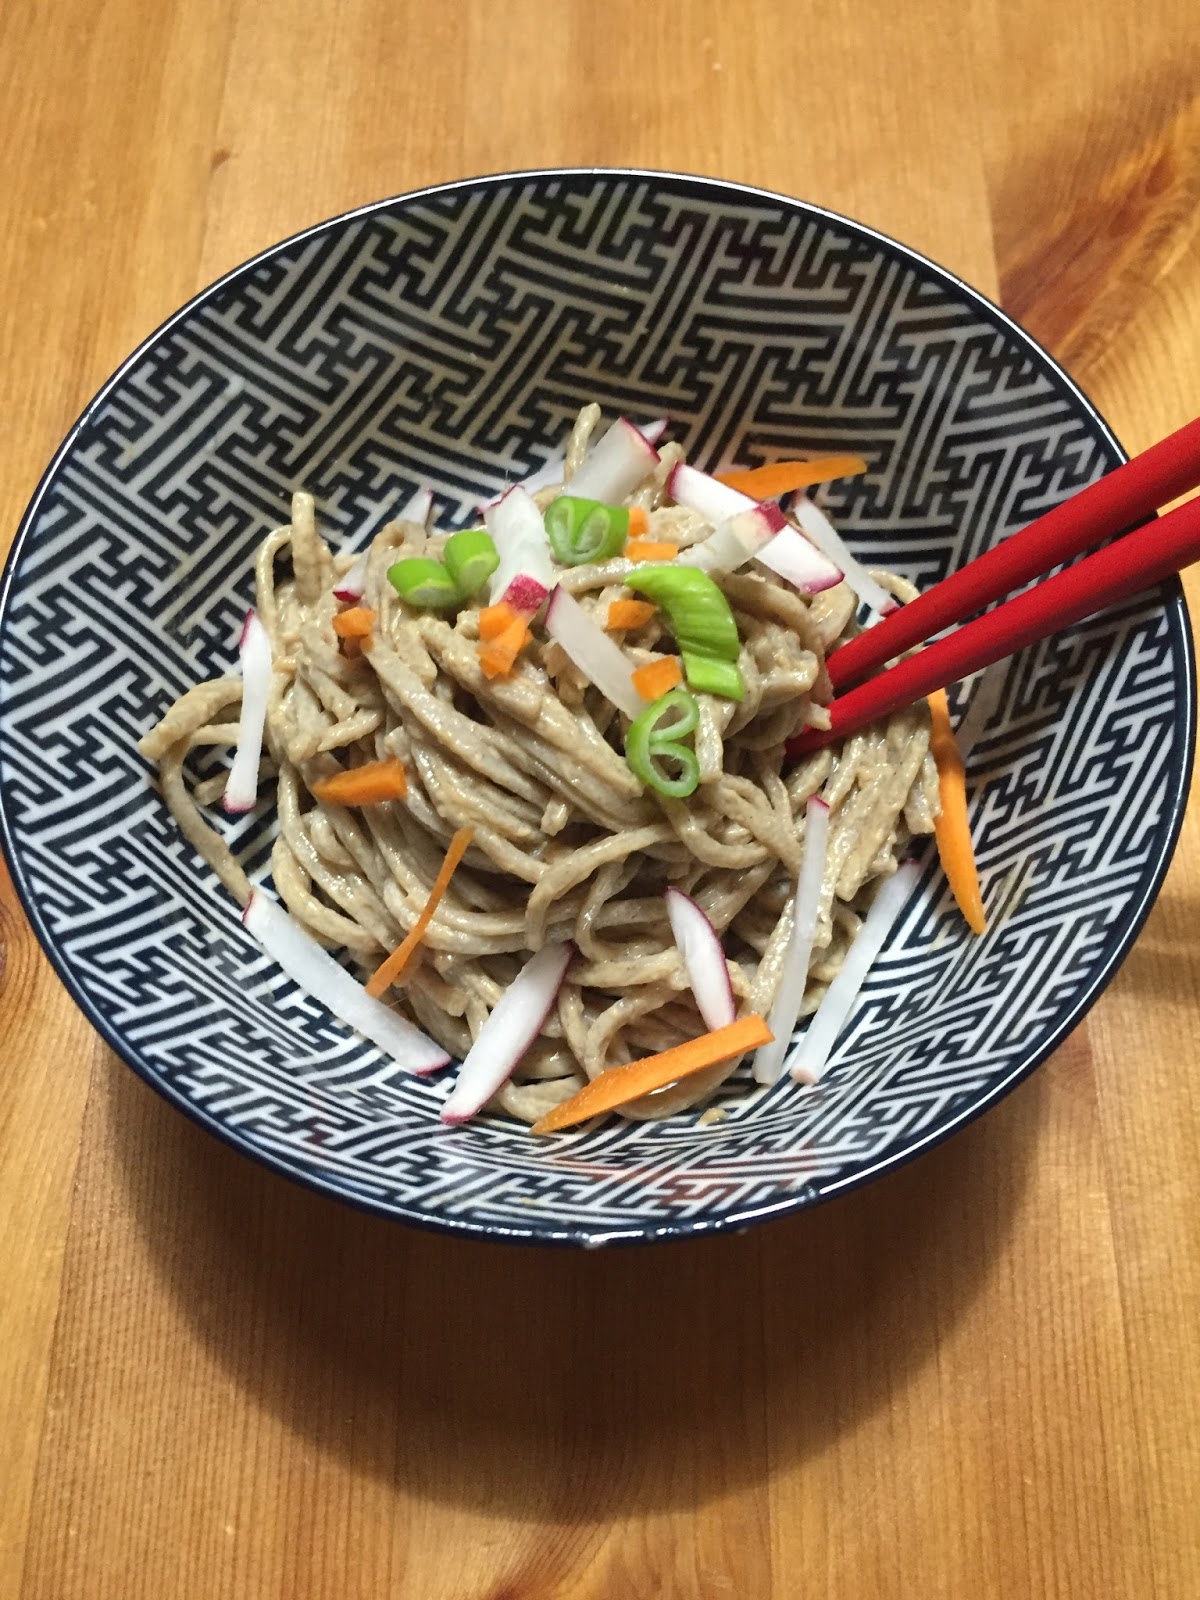
Cold Sesame Noodles

I love noodles!! It's a carb thing. I remember my first time having cold sesame noodles, I was taken aback. There was a large group of us and one of my friends was familiar with the restaurant so she ordered for all of us. I had no idea the dish ordered would be cold. Once I got over the shock, I realized I was in love. Not only is this dish tasty, it works particularly well when you need a quick meal (like a school lunch). The noodles only take 5 minutes to cook and it does not need to be re-heated. I actually always have a bag of flat buckwheat noodles laying around. It's perfect for that morning you decided to ignore the alarm and time got away from you.


But back to the noodles. I remember reading an article in the New York Eater about these noodles originating almost 40 years ago in New York at a restaurant called Hwa Yuan. The article stated that it was the favorite dish of all the stars. Well, we are all stars today. Hooray!!

Note: Adapted from the recipe in the New York Times. The recipe below suggests chinese sesame paste but I use tahini paste because that's what I have on hand in my house.

Cold Sesame Noodles
Makes 6 Servings

Ingredients:
1 pound Chinese buckwheat noodles (spaghetti noodles)
2  1/2 tablespoons sesame oil
3 1/2 tablespoons soy sauce
2 tablespoons Chinese rice vinegar
2 tablespoons Chinese sesame paste (or tahini paste)
1 tablespoon smooth peanut butter
1 tablespoon sugar
1 tablespoon grated ginger
2 teaspoons minced garlic
2 teaspoons chili -garlic paste - optional

Garnish: Carrots, cucumbers or radishes cut into match sticks
sesame seeds
finely chopped green onion

Note: 2 packets of soy sauce equals a little more than 1 tablespoon. Yeah, I've done it. So what.

Directions: 

Bring a large pot of water to a boil. Add noodles and allow noodles to cook about 5 minutes or until tender.

Drain pot and rinse noodles with cold water.


Sprinkle noodles with 1/2 tablespoon of sesame oil. Place noodles in the fridge.

In a bowl whisk together sesame oil, soy sauce, rice vinegar, sesame paste, sugar, ginger, garlic and chili -garlic paste (if using)

Pour sauce over noodles and toss.

Add garnishes.

This is really a versatile dish that can become a full meal if you add a protein like tofu or chicken.


So, how will you eat your sesame noodles?


Tuesday, September 27, 2016

Peruvian Quinoa Soup

These days some magazine is always talking about super food this and superfood that. But let's be honest, we want food that tastes good and makes us feel good. I was first introduced to quinoa by an Argentinian colleague of mine. We were having a conversation about her family being Jewish and Argentinian and how there are all these misconceptions about her. My point is she mentioned her family did not eat rice, but quinoa. At the time, I was only really familiar with food from places like Puerto Rico and the Dominican Republic because of where I grew up. I thought everyone ate rice. Boy was I wrong. Of course, she was a sweet heart and didn't embarrass me just educated me. And she did it the best way possible, with food. One of the dishes I had was sopa de quinoa - quinoa soup. It was warm and delicious and perfect for a chilly Fall day.


Sopa de quinoa can be made as a vegetarian dish or with meat. When I first had this dish in the Fall many years ago it was served with beef. And though the person who introduced it to me was from Argentina, I later learned that quinoa was the staple of several other Latin American nations like Peru. Each nation makes its version of soap de quinoa based on the food stuff of that country. This will be a vegetarian version (for all my non meat eating friends), since I'm constantly trying to prove I can make great comfort food without meat. Since this is a vegetarian version feel free to amp it up with all of the Fall vegetables you like. Me... I'm adding corn, potatoes, maybe even some squash. It's really a great healthy dish. Defying the misconception that all comfort food is bad for you. It's got tons of vegetables and the quinoa provides a healthy protein.

Peruvian Quinoa Soup
makes 6 to 8 servings

Ingredients
1 cup quinoa
2 cups of water
3 cups of vegetable stock
2 cloves of garlic minced
1/2 onion sliced
2 medium carrots (chopped)
2 stalks of celery (chopped)
1 cup of potatoes (boiled & cubed)
1 cup corn
1 cup of winter squash (cubed)
fresh parsley or cilantro
1 teaspoon cumin
1 teaspoon salt
2 tablespoon sazon
1 teaspoon oregano
1 teaspoon paprika
2 bay leaves
1 tablespoon olive oil

Directions:
Start by rinsing the quinoa. Place quinoa is a coffee filter and then place in a strainer.

Gently allow water to flow over quinoa and out the bottom of the strainer.

Place aside and allow quinoa to dry.
In a medium pot heat olive oil over medium heat.

Add garlic and onions to pot and cook until soft (about 2 minutes).

Add corn, squash pre cooked potatoes and any additional vegetables and cook for 10 minutes.

Once vegetables begin to become slightly soft, add cumin, paprika, oregano, sazon, parsley and salt.


Add quinoa and mix so all elements are covered with spices about 10 minutes.

 Add water and vegetable stock. Stir well and bring to a boil.

Once boiling turn heat to medium low and cook for 20 minutes.

Salt and pepper to taste.

Top with onions and avocados or with sour cream and diced chili peppers. Any way you top it, it's delicious.

If you like this dish, please scroll to the bottom and subscribe.


Tuesday, September 20, 2016

Corn and Poblano Empanada

September 15 is the beginning of Hispanic Heritage month. In celebration of hispanic heritage month I wanted to share some of my favorite dishes. The first is a corn and poblano pepper empanada. Typically I eat empandas filled with meat but while prepping for a dinner with some of my friends I realized I needed something without meat. Little did I know I, this carnivore would fall in love with a vegetarian empanada. The mixture of cream cheese, peppers, corn and potatoes creates the perfect gooey bite with a bite of crunch. It's extremely easy to make and requires very little cooking (especially if you use a frozen bag of corn). It's actually the prefect dish if you are in a rush  but want something filling and flavorful.


So congrats to those Latin American nations that gained independence throughout the month of September. It literally changed the course of the Americas. Of course, since I teach history, I think it's important to honor the contributions of all Americans. Of course, because of my upbringing I have an affinity for mi gente from this region. It's in their kitchens that I learned how to cook hispanic food from as young as 6 years old. My friends and their families welcomed me into their homes and their lives. Making a place for me in the kitchen and at the table allowing me to experience and enjoy hispanic food and culture years before I ever traveled anywhere. It is those bonds an ties that ignited my love of hispanic culture and cuisine. And to them I must say, thank you.

Corn & Poblano Empanada
Makes 12 Empanadas

Ingredients
1 tablespoon vegetable oil
2 poblano peppers (roasted and diced)
1 1/2 cups of corn
1/2 pound of petite potatoes (3) (diced)
1 green onion chopped
1/2 cup cilantro chopped
2 cloves garlic minced
2 ounces Mexican queso/Monterey jack cheese (shredded)
4 ounces cream cheese
1/4 teaspoon cumin
1/4 teaspoon salt
12 large empanada wrappers
1 egg, slightly beaten

Tools: baking sheet, spatula, parchment paper


Directions:

Preheat oven to 375 degrees Fahrenheit.

Roast poblano pepper over an open flame until slightly blistered. Once cooled dice.


Boil potatoes with sea salt over medium high heat for 20 minutes. Potatoes should be firm. Once cooled, dice.

Heat oil in a skillet over medium heat. Add diced garlic and stir until soft.

Add corn to garlic along with salt and cumin. Cook for 5 to 8 minutes. Corn should turn slightly brown. Remove corn and garlic from heat.

In a bowl, add cream cheese, monterey jack cheese, potatoes, poblano pepper, corn with garlic, green onion and cilantro. Season with salt and pepper.


Scoop two (2) spoonfuls of corn mixture into wrapper (use the back of the spoon to push mixture to the center.


Gently fold wrapper over lining the edges. Once edges a lined up gently press dough together with a fork.

Place parchment paper on baking sheet and spray with non-stick spray.

Gently brush empanadas with beaten egg.

Place baking sheet on the top shelf of the oven and bake until golden brown (about 20 minutes).


Note: This dish is great with some spice. When I'm not concerned with making it too spicy for my mini me I add some jalapeño peppers to the mix. I typically make a little spicy dipping sauce with garlic, hot peppers, onion and lime juice. Don't forget the salt and pepper.

How do you like your empanada? Mild or Spicy?


Tuesday, September 13, 2016

Thai Basil and Beef Stir Fry

Ever have an idea that grows into a huge project? Our garden started as just a little box of herbs on our balcony. Eventually, it grew into the staple of our summer times dishes. This year we've had to be especially diligent about picking basil and mint from our garden. The basil in particular has a mind of its own and has spread to other plants. So, we're also trying to find different recipes we can use it in. This week we had a stroke of luck and we received some free steaks. Woo hoo!! I love free. Of course, that cemented what I would make. Thai Basil and Beef Stir Fry.  I had a little dried Thai Basil left over from another dish I had made, so I mixed it with fresh basil from the garden.


I love Thai food and this dish, has all my favorite elements, layers of flavor, a bit of spice, tasty vegetables and it can be served with rice. It's filling and warming. And not just because of the heat from the Thai chili peppers. I'm pretty conservative with the amount of pepper I add but if you like spice add another chili pepper and make sure to add the seeds.

Now that I think of it, this is actually a great dish for several other reasons. It utilizes the excess basil in the garden, it includes vegetables but more importantly, it's quick and easy. It only takes about 20 minutes to make. That's so important on a week night. Of course, some of these items you may not have in your cabinet if you don't make Asian inspired dishes. But if you know you want to make several different Asian dishes it will be important to keep items like soy sauce, fish sauce and ginger on hand. I keep those items stocked in my pantry to add variety to our lunches and dinners. Having those things on hand makes life easier. In the end, you can't hate great food, done fast. Now that's comforting on so many levels.


Thai Basil Beef Stir Fry
Makes 6 servings

Ingredients
1 pound of beef
2 teaspoons of cornstarch
2 tablespoon sesame oil
1 teaspoon oyster sauce
1/2 tablespoon of fish sauce
2 red bell peppers sliced
1 onion thinly sliced
1 can of baby corn
2 carrots sliced
4 ounces of mushrooms sliced
4 cloves of garlic (chopped)
2 teaspoons fresh ginger grated
1/4 teaspoon sugar
1/3 cup of soy sauce (Low sodium)
1 hot red pepper/ thai chili pepper (chopped)
1 cup of fresh/dried thai basil (Italian basil will do though the flavor will be slightly different)
1 cup of chopped thai basil
1/4 teaspoon salt
1/4 teaspoon ginger powder
1/4 teaspoon garlic powder
Juice of 1 lime

Directions:
Whisk together fish sauce, oyster sauce, soy sauce, sugar and ginger.

Slice beef thinly (against the grain-look for lines) then sprinkle with ginger powder, garlic powder and salt.

Mix beef with 1 teaspoon of sesame oil and cornstarch.

Heat wok or large pan over high heat and add 1 tablespoon of oil.

Place beef in pan and cook until browned. About 2 minutes per side.

Remove beef from pan and set aside.

Add the rest of the oil and chopped garlic and Thai chili pepper to wok/pan. Cook for 30 seconds

Next add onions and red peppers to pan. Cook until onions caramelize.

Next add stir fry vegetables and allow to cook for an additional 5 to 8 minutes.


Toss beef back in with soy sauce mixture and dried basil (if you are using dried basil)
and stir into vegetables.

Add fresh basil and stir.
Serve over rice with a spirts of lime and enjoy.


Tuesday, September 6, 2016

Fried Tofu with Ginger-Sesame Sauce

September is back to school time and many of us hope to send happy little faces to school to become better versions of themselves. So, we try to send them to school with everything they need and a little piece of home. Something that makes them smile when they open their backpack or lunchbag. But how do you fit that type of comfort in such a small bag with all of the restrictions the school has. The no gluten, no nut etc etc has been the bane of my school lunch existence. What to do? What to do?


Of course, in our house we don't change what we eat because you're a mini me, so this is another  obstacle with school lunch. But this fried tofu lunch doubles just fine for an adult and a child. The original recipe comes from Food and Wine magazine and has a bit more spice. I had to cut down on the red pepper flakes in the ginger-sesame sauce for my little but that spice can be added back in later. This sauce is actually so good, I think about pouring it over other proteins. Like maybe fried chicken wings?? I might have to give the Korean fried chicken place a run for its money. Of course, you should enjoy the sauce whatever way you choose.


Fried Tofu with Ginger-Sesame Sauce
Makes 4 servings

Ingredients:
Ginger-Sesame Sauce
1/2 sesame oil
2 teaspoons grated ginger
2 cloves grated garlic
1 scallion
1 1/2 tablespoon Soy Sauce
1 tablespoon water
1/4 teaspoon crushed red pepper flakes

Fried Tofu
14 ounces firm tofu
2 tablespoons of vegetable oil

Directions:

Slice tofu into 8 thin slabs. Allow tofu to dry on a paper towel.

Lightly sprinkle tofu with salt and press out excess moisture.

While tofu is drying out, in a small bowl whisk together sesame oil, ginger, garlic, soy sauce, water and red pepper flakes.


Set ginger sesame mixture aside.

In a large skillet heat 1 tablespoon of oil (tofu should be added to an already hot pan).

Cook the tofu in two batches using 1 tablespoon of oil for each batch.


Add tofu slabs and cook over medium heat. Cook for approximately 3 to 5


minutes on each side or until tofu is lightly browned on each side.

Spoon ginger-sesame sauce over fried tofu and sprinkle scallions over.

Serve over rice or steamed vegetables.

When packing this as a lunch, I put the sauce in a separate container to be poured over the tofu and vegetables later.


Quick, easy and versatile. If you do not like tofu, you can swap it out for any other protein and it will work.